Ever wondered why one compost pile turns into rich, earthy soil in weeks while another just sits there smelling like rotten eggs? Most of the time, it comes down to one thing: the green to brown compost ratio.
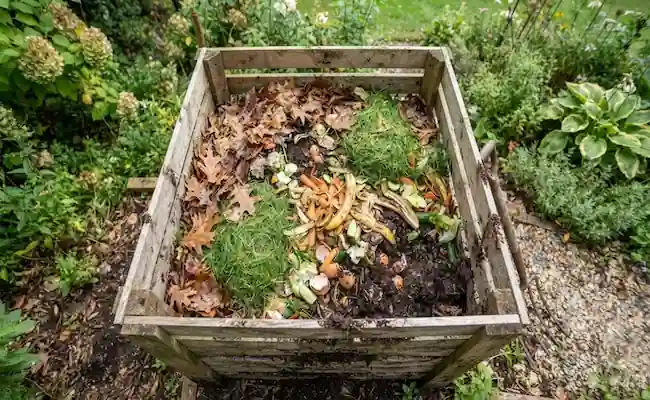
Get this balance wrong, and even the most expensive bin won’t save your pile. Get it right, and kitchen scraps and yard waste break down almost on their own. In this guide, I’ll walk you through exactly how much green and brown material your compost needs, why the balance matters so much, and how to fix it when things go wrong.
What Greens and Browns Actually Do
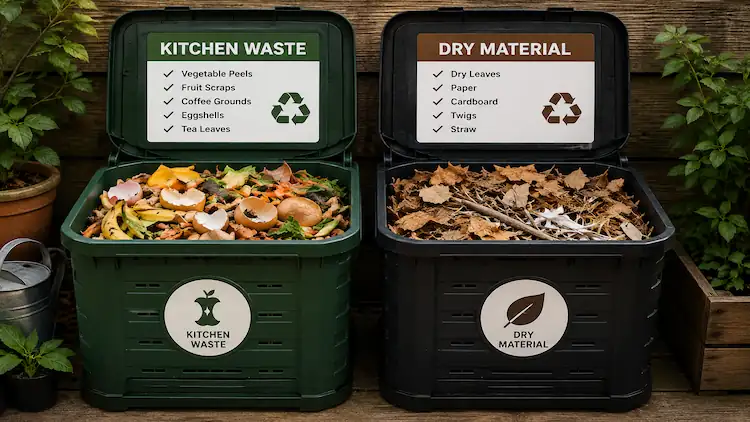
Before you touch the ratio, you need to know what you’re balancing. Greens are the nitrogen-rich, wet materials that feed the microbes and help the pile heat up quickly.
Browns are the carbon-rich, dry materials that give microbes energy and let air move freely through the pile. Without enough of either, decomposition either stalls completely or turns into a wet, smelly mess.
| Type | Examples | What It Gives the Pile |
|---|---|---|
| Greens | Grass clippings, fruit and veg scraps, coffee grounds, fresh weeds, manure | Nitrogen (protein for microbes) |
| Browns | Dry leaves, straw, cardboard, wood chips, sawdust, dead stalks | Carbon (energy for microbes) |
One thing I always tell people: don’t judge material by color alone. Dried grass is still a green because of its nitrogen content, and coffee grounds look brown but act like a green. The real test is touch, not color greens are wet and soft, browns are dry and woody. If you keep this distinction in mind, sorting your kitchen and yard waste becomes second nature within a week or two.
The Green to Brown Compost Ratio Explained
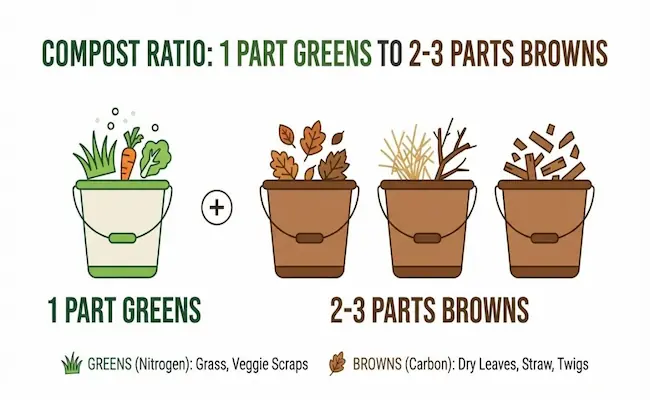
Here’s the part everyone actually searches for. The ideal balance sits somewhere between 1:2 and 1:3 by volume meaning one bucket of greens for every two to three buckets of browns. If you prefer the scientific route, the greens to browns ratio for compost by weight works out to roughly 25-30 parts carbon to 1 part nitrogen (25-30:1 C:N ratio in composting terms).
You don’t need a lab to get this right. A rough visual check works fine for most home piles:
- Mostly brown material with pockets of green scattered through it.
- No standing water or soggy clumps anywhere in the pile.
- A crumbly, not slimy, texture when you squeeze a handful.
- A faint earthy smell rather than a sour or ammonia-like odor.
I think this is where most beginners go wrong they pile grass clippings on top without covering them, and the pile turns into a wet mat instead of a balanced mix. A little planning before you dump your scraps saves weeks of troubleshooting later.
Hot Composting vs Cold Composting Ratio
Not every pile needs the same balance. If you’re running a hot composting setup turning it often and aiming for fast results use 2 to 3 parts browns for every 1 part greens. This pile heats up quickly and can finish in as little as 2 to 3 months if you stay consistent.
Cold composting is the lazy, hands-off version. You add scraps whenever you have them, don’t turn much, and let nature take its time often 1 to 2 years. For this method, stick closer to a 1:1 brown and green compost mix. It’s slower, but honestly, it’s the method I’d recommend if you don’t want to babysit a bin every single week.
How to Work Out Your Compost Carbon to Nitrogen Ratio
If you want precision instead of guesswork, you can calculate the compost carbon to nitrogen ratio yourself using this simple process:
- Weigh each ingredient you’re adding to the pile.
- Multiply each ingredient’s weight by its carbon percentage, then add these up for your total carbon value.
- Do the same with nitrogen percentages to get your total nitrogen value.
- Divide total carbon by total nitrogen. That number is your final C:N ratio.
Research from the Cornell Waste Management Institute shows that a starting ratio of about 30:1 gives the fastest decomposition, and as the pile breaks down, that number naturally drops to around 10-15:1 in finished compost. So don’t panic if your finished compost tests lower than where you started that’s completely normal and expected.
Quick Ingredient Chart
| Ingredient | Carbon % | Nitrogen % |
|---|---|---|
| Dry leaves | 20-35 | 0.4-1.0 |
| Straw | 48 | 0.5 |
| Grass clippings | 10-15 | 1.0-2.0 |
| Kitchen scraps | 10-20 | 1.0-2.0 |
| Wood chips | 25-50 | 0.1 |
| Coffee grounds | 25 | 1.0 |
Layering a Brown and Green Compost Mix
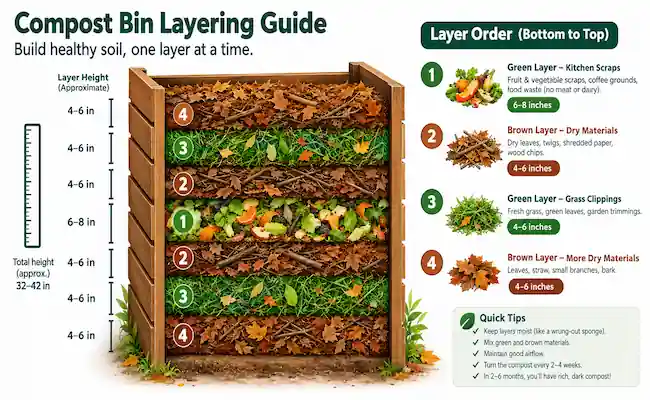
Building the pile the right way matters as much as getting the ratio itself correct. When you’re layering a brown and green compost mix, keep each green layer around 2 to 3 inches deep and cover it with a slightly thicker brown layer. This stops flies from gathering and keeps odors locked inside the pile instead of drifting through your yard.
A layering sequence that’s worked well for me over the years:
- Start with a 6-inch base of coarse browns for drainage.
- Add a 4-inch layer of greens and mix lightly.
- Cover with 4 to 6 inches of browns.
- Repeat these layers until the pile reaches about 3 feet tall and 3 feet wide.
If you’re short on browns, cardboard from your recycling bin works just as well as dry leaves. And if you’re new to this altogether, it helps to read up on starting a compost bin before you build your first pile, since bin size and material affect how you layer everything.
Moisture, Aeration and Temperature
Your pile should feel like a wrung-out sponge damp, not dripping, and never crumbly dry. If it’s too wet, add more browns and mix thoroughly. If it’s too dry, water it lightly while turning the material.
Temperature tells you a lot about how well your ratio is working. A healthy, active pile should reach 54-66°C (130-150°F) within the first few days of building it.
According to the US EPA’s composting guidance, this heat range is what kills weed seeds and most pathogens while keeping the beneficial microbes alive and working. If your pile never heats up, you’re likely short on greens or moisture.
Turn the pile every 1 to 2 weeks to keep oxygen flowing through the center. You can also try a compost tumbler if turning a heavy pile by hand isn’t practical for you or your space.
Fixing a Pile That’s Off Balance
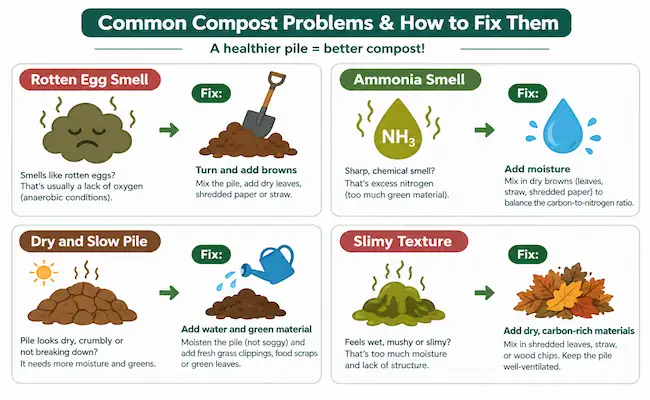
| Problem | Likely Cause | Fix |
|---|---|---|
| Rotten egg smell | Too wet, not enough air, too many greens | Add browns, turn the pile |
| Ammonia smell | Too much nitrogen | Add shredded cardboard or dry leaves |
| Pile is dry and slow | Too many browns, not enough moisture | Add greens, water it, turn |
| Slimy texture | Excess greens, especially fresh grass clippings | Mix in more browns and turn well |
If your compost still smells off after adjusting the ratio, it’s worth reading a dedicated guide on smelly compost fixes, since persistent odor usually points to a deeper moisture or aeration issue rather than just the greens and browns balance.
Adjusting the Ratio by Season
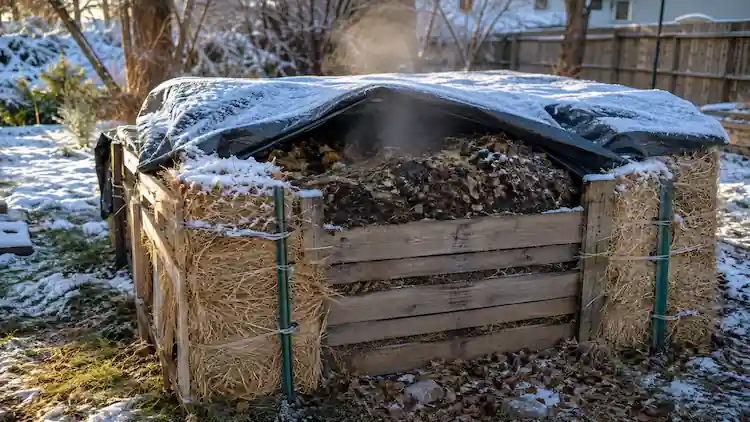
You’ll notice the balance shifts with the weather throughout the year. In colder months, materials break down slower, so add slightly more greens and insulate the pile with extra browns or a tarp on top.
In hot, humid seasons, moisture evaporates fast, so you may need to water more often and add browns to soak up the excess wetness. If you’re composting through worms instead of a traditional pile, the ratio rules shift again entirely check a proper vermicomposting guide before feeding your bin the same way you’d feed an outdoor pile.
Small Spaces, Bokashi, and Other Methods
If you’re composting in an apartment or on a balcony, the same rules apply, just at a smaller scale. A countertop bin holds a lot less material, so keep the ratio closer to 1:1 greens to browns and stir more often since there’s less bulk to hold heat or trap smells. Shredded cardboard or newspaper works well as a compact brown source when you don’t have access to dry leaves.
Bokashi is a bit different from everything else here. Instead of relying on the usual carbon and nitrogen balance, you layer food scraps with a bran inoculated with beneficial microbes and let it ferment in a sealed bucket.
There’s no need to balance carbon and nitrogen the usual way, though you’ll still want to bury the fermented material in soil or an outdoor pile afterward to finish breaking down.
Tools That Make This Easier
You don’t need much gear to get the ratio right, but a few tools take the guesswork out:
- A compost thermometer to track that 54-66°C (130-150°F) heat range.
- A moisture meter, or just your hand, for the sponge test.
- A garden fork or compost aerator for turning without heavy lifting.
- A kitchen caddy to collect greens before they hit the outdoor pile.
Knowing When Compost Is Ready
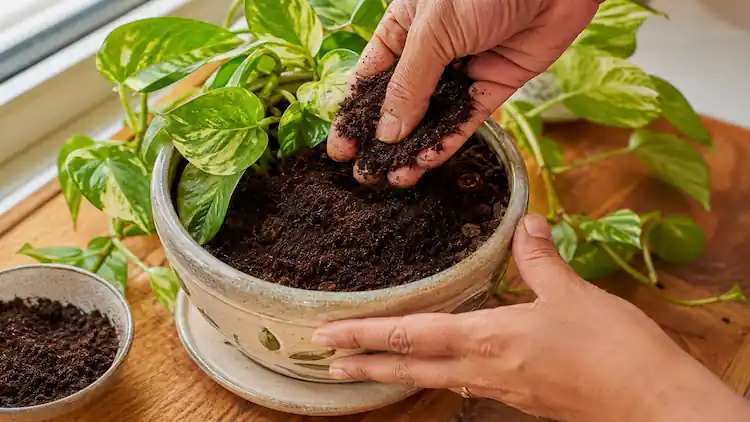
Finished compost looks dark brown to black, crumbles easily, and smells like fresh soil rather than anything sour or rotten. You shouldn’t be able to recognize the original food scraps or leaves anymore.
Depending on your method, this can take anywhere from 2 months for a well-managed hot pile to a year or more for a cold, hands-off one. Screen it through a half-inch mesh before use to catch any twigs or chunks that need more time.
What Not to Add
A good ratio won’t fix a pile with the wrong ingredients sitting inside it. Skip these regardless of your green-to-brown balance:
- Meat, bones, and dairy products.
- Oily or greasy food waste.
- Diseased plant material or weeds gone to seed.
- Pet waste from cats and dogs.
Once your compost is finished dark, crumbly, and smelling like fresh soil you can work it straight into garden beds or blend it with organic mulch for an extra nutrient boost around established plants.
Final Thoughts:
At the end of the day, composting isn’t complicated once you understand the basics behind it. Keep the green to brown compost ratio somewhere around 1:2 to 1:3 by volume, watch your moisture and smell closely, and adjust the mix as the seasons change. In my experience, the pile forgives small mistakes as long as you keep browns and greens roughly balanced over time. Stick with it, and you’ll have dark, crumbly compost feeding your garden before you know it.