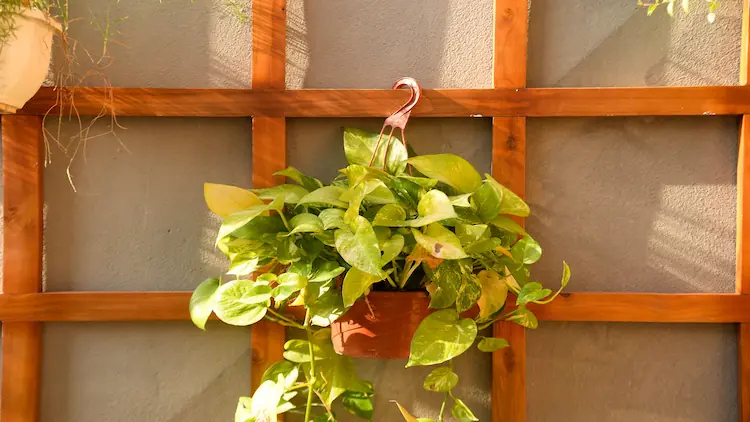
If you already own a Marble Queen Pothos, you are sitting on a plant that can turn into five or six more plants without you spending a single rupee extra. I have propagated this variety more times than I can count, and honestly, it is one of the most forgiving plants you can practice on.
This guide walks through every part of how to propagate Marble Queen Pothos properly, including a few things that most articles online skip completely, like how to actually find a node, whether you should let the cutting rest before planting, and why some of your new cuttings might come out fully green instead of that pretty marbled pattern.
There are two main ways to propagate Marble Queen Pothos, water and soil, and both get covered here in full detail, along with the mistakes that usually cause a cutting to fail. By the end of this, you will know exactly how to propagate Marble Queen Pothos in water, how to propagate Marble Queen Pothos directly in soil, and which one actually makes more sense for your home setup.
What You Will Need Before You Start
Nothing fancy here. Anyone who wants to propagate Marble Queen Pothos does not need special equipment, and the tools reflect that:
- A pair of clean scissors or pruning shears (wipe the blade with rubbing alcohol first, it really does cut down on infections)
- A glass jar or small container, if you are going the water route
- A small pot with drainage holes, if you are going straight to soil
- A light, well-draining potting mix (a regular indoor plant mix with some perlite mixed in works fine)
- Rooting hormone powder or gel (optional, but it does speed things along)
- A spot with bright, indirect light for the cuttings to sit in
That is really it. You do not need a greenhouse setup or grow lights to get this to work.
How To Spot The Right Node On Your Pothos
This is the part that trips up most first-timers, and it is honestly the most important step in the whole process. A node is that small brown or tan bump on the stem, usually sitting right where a leaf attaches. Sometimes you will also see a tiny brown root nub or an aerial root already poking out of it. If you run your finger along a pothos vine, you will feel these little bumps every few inches.
Here is the part nobody tells you clearly enough: a leaf by itself, with no node attached, will not grow into a new plant. I have seen people try to root a single leaf in water for months, wondering why nothing is happening. A leaf can survive in water for a long time, it might even look fine, but without a node, there is no tissue that can actually produce roots or a new stem. So before you cut anything, look for that node first, and plan your cut around it, not around the leaf.
A good cutting for propagating Marble Queen Pothos should have:
- At least one healthy node (two or three is even better)
- One or two leaves attached
- No signs of yellowing, black spots, or pest damage
- A stem that looks firm, not limp or wrinkled
Step-By-Step: Taking The Cutting
This is the exact process I follow every time I need to propagate Marble Queen Pothos from one of my own plants:
- Pick a healthy vine that has some new growth on it, meaning the newest leaves look bright and fully formed.
- Find a node about 4 to 6 inches from the tip of the vine.
- Cut about a quarter inch below that node using your clean scissors.
- If your cutting has more than two leaves, trim off the lower ones so the bottom node or two stays bare. This bare section is what will sit in water or soil.
- Repeat along the vine if you want more than one cutting from the same plant. Just make sure each piece has its own node.
That is the whole cutting process. It takes maybe two minutes once you know what you are looking for.
Should You Let The Cutting Rest Before Planting?
This is something almost every guide leaves out, and it makes a real difference, especially for soil propagation. When you cut a stem, the open wound is exposed and moist. If you plant it straight into damp soil, that fresh cut can pick up fungus or bacteria and rot before it ever gets the chance to root.
Letting the cut end dry out for a few hours, sometimes overnight, allows a thin protective layer to form over the wound. This is called callusing, and it is a common trick with succulents that works just as well here. You do not have to do this for water propagation since water does not carry the same rot risk in the same way, but for soil propagation, I would genuinely recommend giving the cutting at least a couple of hours to sit out and dry a little before pushing it into the mix.
Water Propagation Method, Step By Step
This is the method most people use when they first try to propagate Marble Queen Pothos, mainly because you can actually watch what is happening.
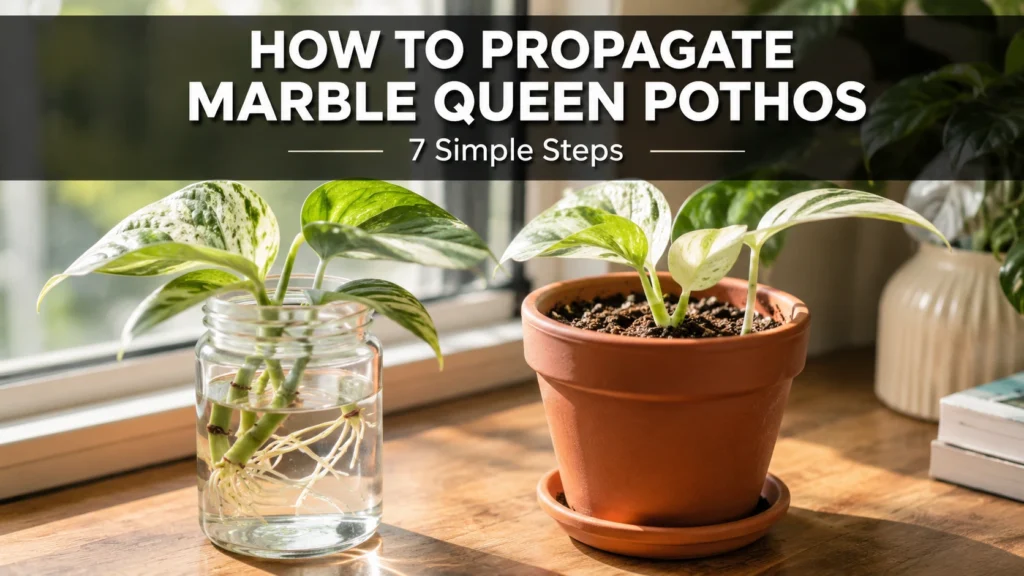
- Fill a jar or glass with room temperature water, enough to cover the bottom node completely.
- Place the cutting in so the node sits underwater but the leaves stay above the waterline.
- Set the jar somewhere with bright, indirect light. A spot near an east or north facing window works well. Direct afternoon sun through glass can actually cook the cutting, so avoid that.
- Change the water every 3 to 5 days. Old, stagnant water is one of the biggest reasons cuttings fail, so do not skip this.
- Watch for small white or pale root nubs forming at the node, usually within 1 to 3 weeks.
- Once roots reach about 1 to 2 inches, the cutting is ready to be moved into soil.
Soil Propagation Method, Step By Step
You can also propagate Marble Queen Pothos by skipping water altogether and going straight to soil, and in some ways it saves you a transplant shock step later:
- Fill a small pot with a light, well-draining potting mix.
- Dip the callused, bare node end into rooting hormone if you are using it.
- Poke a hole in the soil with a pencil or your finger and place the cutting in, making sure the node is fully covered.
- Water gently until the mix is evenly moist, not overly wet.
- Cover the pot loosely with a clear plastic bag or a plastic dome to hold humidity in. Just make sure the plastic is not touching the leaves directly.
- Keep the soil lightly moist, never dripping wet, and check on it every couple of days.
- New growth at the tip is usually your sign that roots have formed underneath, typically around 3 to 4 weeks in.
Water Or Soil, Which One Should You Actually Pick
Both work when you propagate Marble Queen Pothos, but they are not identical, and picking the right one depends on what you actually want out of it.
| Water Propagation | Soil Propagation | |
|---|---|---|
| Best for | Beginners who want to watch progress | Skipping the transplant step later |
| Root visibility | You can see roots forming | You cannot see anything until you check |
| Speed to first roots | Usually a bit faster | Slightly slower, but roots are already soil-adapted |
| Risk of rot | Lower, as long as water is changed | Higher if soil stays wet for too long |
| Transplant shock | Yes, roots need to adjust to soil later | None, roots grow used to soil from day one |
In my experience, if this is your first time propagating anything, water is the more forgiving choice because you get visual feedback. But if you already have a feel for watering houseplants, going straight to soil skips a step and avoids that little adjustment period some cuttings go through when they move from water to soil.
How Many Cuttings To Put In One Pot
This part gets skipped in most guides, but it matters more than you would think. A single 4 inch pot can comfortably hold 3 to 4 cuttings, which is actually how most nurseries get that thick, bushy pothos look you see in stores. Just space the nodes about an inch or two apart so the roots have room to spread without tangling into each other too much.
If you are using a bigger 6 inch pot, you can go up to 5 or 6 cuttings. Cramming too many into a small pot can lead to poor air circulation around the base, which raises the chances of fungal issues down the line.
How Long Does It Actually Take
Most people who want to propagate Marble Queen Pothos are really just asking for a straight answer on timing, so here is the full breakdown from cutting to established plant.
| Stage | Typical Timeframe |
|---|---|
| First visible root nubs (water) | 1 to 2 weeks |
| Roots long enough to transplant | 3 to 4 weeks |
| First new leaf after soil transplant | 3 to 5 weeks after transplanting |
| Fully established, growing plant | 8 to 10 weeks from the original cut |
Keep in mind these numbers shift depending on your room temperature and light. Warmer rooms, somewhere around 70 to 80°F, tend to root faster than a cold windowsill in winter.
Why Some Cuttings Turn Fully Green Instead Of Staying Variegated
Here is something worth knowing before you start snipping randomly. Marble Queen Pothos gets its white and green pattern from something called chimeric variegation, which basically means the plant has two different types of cells growing side by side, one that produces chlorophyll (green) and one that does not (white or cream). Because these cell types are not evenly mixed, some stems on the same plant will naturally lean more green while others lean more white.
If you take a cutting from a section that is mostly or fully green, that cutting will likely grow into an all-green plant, since it does not have enough of the non-green cell line in it to produce the marbled pattern. On the flip side, cutting from a section that is almost entirely white can sometimes struggle to grow at all, since white leaves cannot photosynthesize much on their own.
The trick is to pick cuttings from vines that show a good, even mix of white and green. That balance gives you the best odds of the new plant keeping the classic Marble Queen look rather than reverting.
Caring For The New Plant Once Roots Show Up
Once your cutting has rooted and is sitting in its own pot, the care routine settles into something pretty low maintenance:
- Watering: Let the top inch or two of soil dry out between waterings. New roots are delicate, and constantly wet soil is the fastest way to lose a young plant.
- Light: Bright, indirect light keeps the variegation strong. Too little light and the white patches tend to fade back to green over time.
- Fertilizer: Hold off for the first month while roots are still settling in. After that, a balanced liquid fertilizer diluted to half strength, once a month during spring and summer, is plenty.
- Humidity: Not required, but a bit of extra moisture in the air helps young cuttings settle in faster, especially if your home runs dry.
Common Problems While Propagating And How To Fix Them
Root Rot :
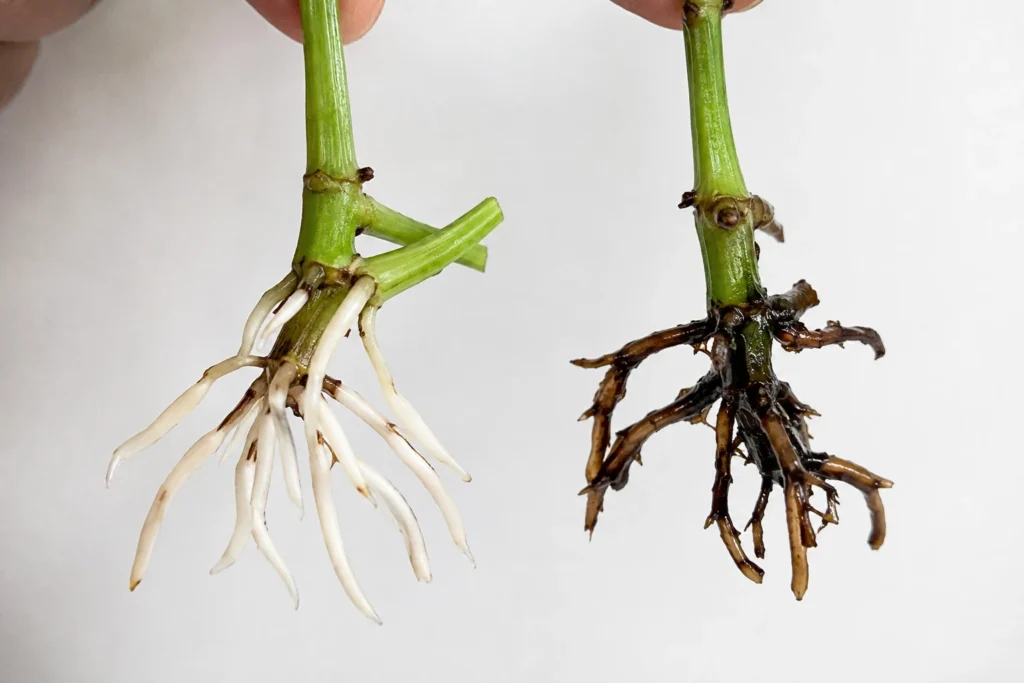
This is the number one reason propagation attempts fail. Healthy pothos roots are white or light tan, firm to the touch, and smell like, well, nothing much at all. Rotting roots turn brown or almost black, feel mushy between your fingers, and give off a smell close to rotten eggs. If you catch this early, trim off the affected roots with clean scissors and change the water immediately, or if it is in soil, repot into fresh, dry mix. Letting water sit too long without changing it, or keeping soil constantly wet, are the two biggest causes.
Leaf Yellowing :
A yellow leaf here and there on a cutting is not always a disaster. It can mean overwatering, too little light, or simply the plant shedding an older leaf to put energy toward new roots. Check your watering schedule first, then your light situation, before assuming the worst.
No Roots After Several Weeks :
If it has been a month with nothing happening, check that your cutting actually has a node submerged or buried, since this is the most common mistake. Also check the room temperature. Anything below 65°F will slow rooting down significantly, and below 60°F, it can stall almost entirely.
Final Thoughts :
Learning how to propagate Marble Queen Pothos is genuinely one of the easier plant skills to pick up, and once you get the hang of spotting a good node and giving the cutting decent light, you will find yourself with far more plants than pots to put them in. Take your time with the first few cuttings, watch how they respond, and you will get a feel for what this plant likes fairly quickly. Whether you stick with water propagation or jump straight to soil, the core idea stays the same: a healthy node, steady moisture, and patience are really all you need to propagate Marble Queen Pothos successfully, again and again, from the very same plant.