If you have been staring at your Thai Constellation Monstera wondering why those gorgeous cream and green leaves suddenly have brown patches on them, take a breath. Thai Constellation Monstera brown leaves are one of the most common questions plant owners ask, and in almost every case, the plant is not dying.
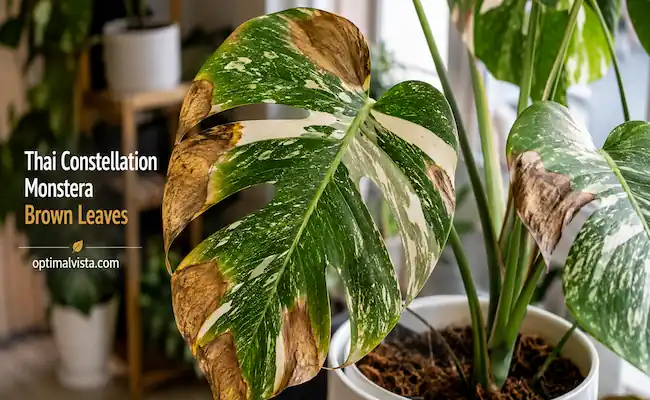
It is just telling you something about its environment is off. I have grown Thai Constellation for a few years now, and in my experience, the panic that sets in when Thai Constellation Monstera brown leaves show up is usually worse than the actual problem.
This plant is expensive and slow growing, so every leaf feels precious. That is exactly why it matters to get the diagnosis right instead of guessing and changing five things at once.
This guide walks through every real cause behind Thai Constellation Monstera brown leaves, how to tell them apart, what to do about each one, and the parts most care guides skip over, like why the white sections brown faster, whether the damage heals, and what to do when the cause turns out to be pests or nutrients rather than water.
Why Cream Sections Brown Faster Than Green Ones
This is the part that confuses a lot of new owners, so let us clear it up first, since it explains a big chunk of why Thai Constellation Monstera brown leaves happen more than on a plain green plant.
The white and cream patches on a Thai Constellation leaf have no chlorophyll in them. Chlorophyll is not just what makes a leaf green, it also gives the leaf tissue a kind of built-in defense against sun damage and moisture loss. Without it, the cream cells are thinner, weaker, and much more sensitive to stress.
That means:
- Sunburn shows up on the cream patches first, almost always
- Dry air pulls moisture out of the cream tissue faster than the green tissue
- Cold damage tends to darken the white sections before it touches the green ones
- Even normal handling, like a leaf brushing against a wall or window frame, can bruise the cream tissue in a way it would not bruise a solid green leaf
So if you notice your green Monstera deliciosa never gets this kind of browning but your Thai Constellation does under the same conditions, this is why. It is not a weaker plant overall, it is just carrying tissue that offers less protection in specific spots.
Is the Brown Damage Permanent, or Will It Heal?
Short answer: once Thai Constellation Monstera brown leaves appear, that damaged part will not turn green or heal back to normal. Plant tissue that has died does not regenerate the way skin does.
But here is the part that actually matters for you going forward: fixing whatever caused the browning will stop new damage. Every leaf your plant grows after you correct the problem should come out clean. The brown patch on the current leaf is basically a record of a mistake that already happened, not an ongoing problem, as long as you address the root cause.
A few practical notes on this:
- Do not cut off a leaf just because it has a brown spot. If more than half the leaf is still green and functioning, it is still feeding the plant through photosynthesis.
- Only remove a leaf entirely if it has gone mostly brown, feels mushy, or is clearly rotting from the base.
- Trimming a small dead edge with clean scissors is fine for appearance, but it will not make the leaf healthier. It is cosmetic.
The Real Causes of Thai Constellation Monstera Brown Leaves
Below is every genuine cause behind Thai Constellation Monstera brown leaves, in the order I usually check them, along with what each one actually looks like on the leaf.
1. Sunburn :
Dry, papery, tan-to-brown patches that show up mostly on the cream areas within a day or two of the plant sitting in direct sun. The green tissue around it usually stays fine. This happens most often when a plant is moved closer to a south or west facing window, or when a curtain that was providing shade gets left open during summer afternoons.
Fix: Pull the plant back two to three feet from direct light, or add a sheer curtain between the plant and the window.
2. Low Humidity :
Thin, crispy, brown edges running along the margin of the leaf, particularly on cream sections. The center of the leaf usually stays firm and healthy. Homes with central heating in winter commonly sit at 25 to 35 percent humidity, which is well below what this plant wants.
Fix: Aim for 55 to 75 percent humidity using a small humidifier near the plant. A cheap digital hygrometer tells you exactly where you stand instead of guessing.
3. Overwatering :
Soft, almost mushy yellow-brown patches, usually starting near the center or base of the leaf. The whole leaf can look limp and heavy. This happens when the soil stays wet for days at a time and the roots start to suffocate.
Fix: Let the top two inches of soil dry out fully between waterings. Push a finger into the soil before you water, do not water on a fixed schedule.
4. Root Rot :
Several leaves yellowing or browning at once, stems feeling soft near the soil line, and a plant that looks tired even though the soil feels wet. Pull it from the pot and check the roots. Healthy roots are pale and firm, rotted roots are dark, mushy, and often smell bad.
Fix: This one needs quick action, covered in detail below.
5. Cold Damage :
Dark, almost blackish brown patches, often starting at the leaf base or along an edge that was resting near cold glass. Below 55°F, tropical plant tissue starts breaking down at the cell level, and a windowsill in winter can drop far colder than the room itself even when your thermostat reads a comfortable number.
Fix: Move the pot at least a foot away from window glass during cold months, and keep the room above 60°F near the plant.
6. Fungal Disease :
Small, roughly circular brown spots, often with a lighter yellow ring around each one. This spreads when humidity is high but air is not moving, which lets fungal spores settle and multiply on wet leaf surfaces.
Fix: Increase airflow with a small fan, remove badly affected leaves, and treat the rest with a diluted neem solution every week or so until it clears up.
7. Nutrient Deficiency :
This one gets skipped over a lot, but it is genuinely common. A lack of potassium in particular shows up as browning along the leaf margins, since potassium helps the plant regulate water movement through its tissue. Too much fertilizer causes the opposite problem, a buildup of mineral salts in the soil that burns root tips and shows up as brown, crispy patches too.
Fix: Feed with a balanced liquid fertilizer at half strength once a month during spring and summer, and stop completely in the colder months. If you see a white crust on the soil surface, flush the pot thoroughly with plain water to wash the salts out.
8. Pests :
Spider mites, mealybugs, and aphids can all cause stress that shows up as brown or bronze colored patches, sometimes paired with tiny webbing or a sticky residue on the leaves. This one is easy to miss because people assume browning always means a watering or light problem.
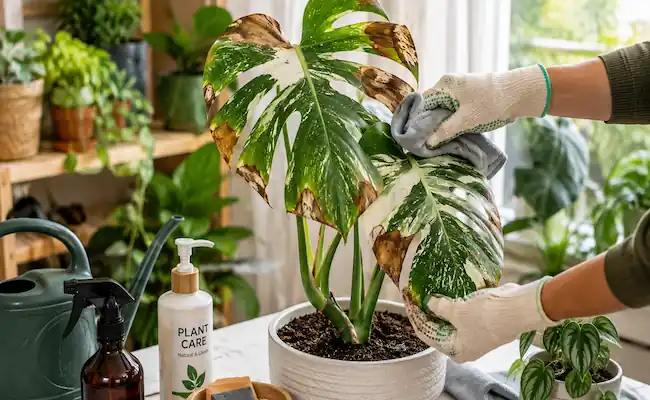
Fix: Check the underside of leaves and along the stem joints with a magnifying glass if needed. Wipe leaves down with a damp cloth, then treat with insecticidal soap, repeating every week until you stop seeing activity.
Quick Diagnosis Table for Thai Constellation Monstera Brown Leaves
| What You See | Most Likely Cause | How Urgent |
|---|---|---|
| Dry tan patches on cream areas after sun exposure | Sunburn | Low, just move the plant |
| Crispy brown edges, rest of leaf firm | Low humidity | Low to moderate |
| Soft yellow-brown patches, limp leaf | Overwatering | Moderate |
| Several leaves yellow at once, mushy stems | Root rot | High, act today |
| Dark near-black patches near a cold spot | Cold damage | Moderate |
| Round spots with a yellow ring | Fungal disease | Moderate |
| Browning along margins, slow growth | Nutrient issue | Low |
| Brown patches with webbing or sticky film | Pests | Moderate to high |
How to Handle Root Rot Before It Spreads
Root rot is the one cause behind Thai Constellation Monstera brown leaves that cannot wait. Here is the process I follow whenever I catch it:
- Take the plant out of its pot right away and gently knock loose soil off the roots.
- Look closely at every root. Healthy roots are firm and light colored. Anything brown, black, or mushy needs to go.
- Using clean, sharp scissors, cut away every rotted root. Do not leave any of it behind, since it can keep spreading to the roots that are still healthy.
- Dust the cut ends with plain cinnamon, which works as a mild natural antifungal, or use a fungicide powder if you have one on hand.
- Repot into a fresh, chunky, fast-draining mix. Never reuse the old soil.
- Hold off on watering for about five to seven days to let the cut roots callous over and reduce the risk of reinfection.
- Keep the plant out of direct sun during recovery and do not fertilize until you see new growth.
If more than half the root system was already gone by the time you caught it, recovery is still possible, but it will take patience. New leaves may be smaller for a while as the plant rebuilds its root mass.
Getting the Watering Routine Right
Since overwatering and root rot cause most of the serious cases of Thai Constellation Monstera brown leaves, it is worth nailing this routine down properly.
- Push your finger about two inches into the soil before every watering. If it still feels damp, wait.
- In warmer months, this usually means watering roughly once a week to ten days.
- In winter, the plant slows down a lot, so stretch that out to every two to three weeks.
- Use a pot with real drainage holes. Without one, excess water has nowhere to go and just sits around the roots.
- A chunky mix with orchid bark, perlite, and a little charcoal drains far better than regular potting soil on its own, and it dramatically lowers your risk of rot.
Getting Humidity and Light Right to Prevent Thai Constellation Monstera Brown Leaves
- Keep the plant in bright, indirect light. A spot a few feet from an east or north facing window works well.
- Avoid harsh afternoon sun hitting the leaves directly, especially the cream sections.
- Aim for humidity in the 55 to 75 percent range. A small humidifier running near the plant, especially in winter, makes a noticeable difference within a week or two.
- Grouping this plant near other tropical plants raises the humidity around it slightly too, since plants release moisture as they transpire.
When It Is Fine to Just Let a Leaf Be
Not every brown spot needs action beyond fixing the cause. If the damage covers less than half the leaf and the rest is green and firm, leave it alone. It is still contributing energy to the plant. Cutting off partially healthy leaves for appearance alone only slows the plant down, since it loses a working leaf for no real benefit.
Only remove a leaf completely when it has gone mostly brown, feels wet and mushy, or shows clear rot spreading from the stem. Use a clean blade and cut just above a node so the plant can direct new growth from that point.
A Quick Checklist Before You Change Anything
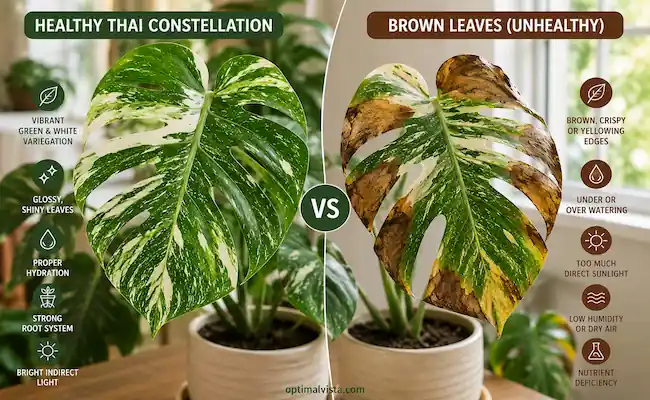
Before you start adjusting five things at once to fix Thai Constellation Monstera brown leaves, run through this:
- Check the soil moisture with your finger, not by looking at the surface.
- Look at where exactly the brown is on the leaf, edge, center, or scattered spots tell different stories.
- Check the underside of the leaf and stem joints for pests.
- Note how close the plant is to a window, a heater, or an air conditioning vent.
- Pull the plant gently to feel if the base of the stem is firm or soft.
Once you match what you are seeing against the causes above, you will usually land on the right answer within a few minutes, instead of guessing your way through weeks of trial and error.
Final Thoughts :
Thai Constellation Monstera brown leaves feel alarming the first time you notice them, especially on a plant that costs this much and grows this slowly. But once you understand that the cream tissue is simply more fragile than the green, the whole thing stops being a mystery. Most cases trace back to sun, dry air, or a watering habit that needs a small adjustment, not a serious illness. Fix the actual cause, be patient with the leaves already damaged, and give the plant time to show you improvement through its new growth. A few weeks of steady, correct care is usually all it takes to see the difference clearly.