
One store-bought bell pepper holds dozens of seeds, and most of them end up in the trash. So why do so many first attempts sit dead still for 6 weeks?
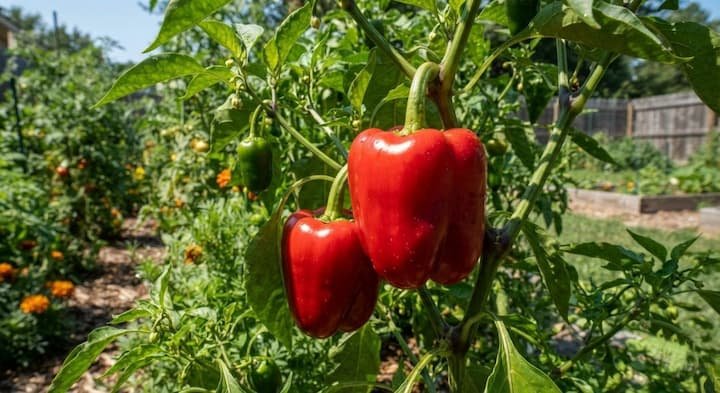
Cold soil is the usual culprit. Here is how to grow bell peppers from seed in the right order, from picking a variety to the last harvest in fall.
Is Growing Bell Peppers From Seed Worth It?
A seed packet costs about the same as one or two nursery plants, and it holds dozens of seeds. Garden centers carry a handful of standard types, while catalogs offer chocolate, orange, and striped bells that never show up in the produce aisle.
Time is the trade-off. Plan on roughly 120 days from sowing to first harvest: 8 to 10 weeks indoors, then 60 to 90 days after transplanting. The payoff is fair, since one healthy plant usually gives 6 to 8 peppers over the season.
Best Bell Pepper Varieties for Home Gardens
California Wonder has been the beginner standard for nearly a century. It is open-pollinated, so saved seeds come true, and the thick walls are great for stuffing.
| Variety | Days to Maturity | Color | Best For |
|---|---|---|---|
| California Wonder | 75 | Green to red | Stuffing, all-purpose |
| Yolo Wonder | 73 | Green to red | Disease resistance |
| Red Beauty | 68 | Deep red | Sweet flavor |
| Orange Sun | 80 | Bright orange | Juicy texture |
Read the packet before buying: days to maturity, plant size, and whether it says hybrid or open-pollinated. Hybrids often bring better disease resistance, but their seeds will not copy the parent.
In USDA Zones 4 and 5, favor varieties under 75 days, like Red Beauty and Yolo Wonder. For containers, look for compact plants.
Packet Seeds vs Seeds From a Store-Bought Pepper
Seeds from a reputable nursery or catalog are the safest bet, since the variety and germination rate are known. Seed swaps run by a community gardener group are another cheap source.
Seeds from a grocery pepper can work too, and trying costs nothing. Most grocery peppers are hybrids, though, so the plants might come out smaller or plainer than the parent.
Think of it as a genetic lottery. If going this route, grab a fully ripe, unblemished pepper that is deep red, yellow, or orange.
How to Save, Dry, and Test Pepper Seeds
Saving seeds is simple (packet seeds come pre-dried, so this is only for home-saved ones):
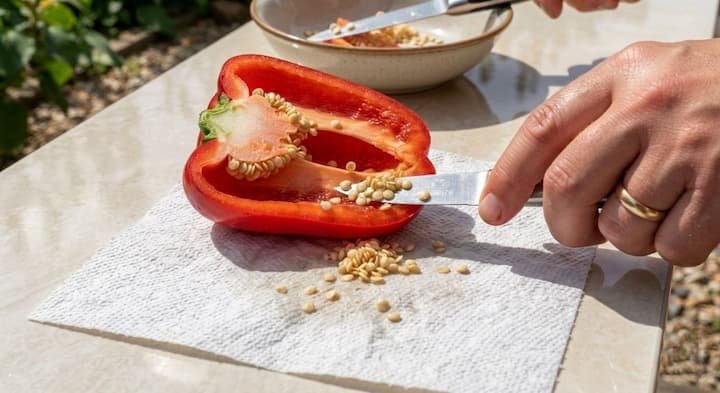
- Cut a fully ripe pepper open, scrape out the seeds, and rinse off the pulp.
- Spread them on a paper towel and dry about a week, away from direct sun.
- Keep plump, firm seeds and toss the shriveled ones.
- Store in an airtight container in a cool, dry, dark spot; a warm, humid shelf kills seeds fast. Seeds usually stay good for 2 to 3 years.
Test old seeds before sowing. Put 10 seeds on a damp paper towel, slide it into a zip bag, and keep it warm for 7 to 14 days. If 8 sprout, that is an 80% rate and the batch is fine. Fewer than 5 means buy fresh seed or sow extra.
One catch: peppers cross with nearby varieties, so seeds saved from a plant growing next to hot peppers can give surprise fruit.
Soak or Skip: Planting Bell Pepper Seeds the Smart Way
Soaking softens the seed coat and can speed up sprouting. Use warm water for 8 to 12 hours, and add a drop or two of diluted hydrogen peroxide to cut down seed-borne disease.
It is optional, though. With a heat mat running, soaking matters much less, and I usually skip it for fresh packet seeds.
When to Start Bell Pepper Seeds Indoors
Count backward from the average last frost date. If frost usually ends May 15, sow between March 1 and March 15. Most sources say 8 to 10 weeks before frost, and a few say 6 to 8. Faster varieties can handle the shorter window, but the extra time builds stronger roots, so 8 to 10 wins for me.
Rough start windows for USDA Zones 4, 5, 6, 7 and 8:
| USDA Zone | Typical Last Frost | Start Seeds Indoors |
|---|---|---|
| Zone 4 | Mid to late May | Early March to early April |
| Zone 5 | Late April to mid-May | Mid-February to mid-March |
| Zone 6 | Mid-April to early May | Early February to early March |
| Zone 7 | Early to mid-April | Late January to mid-February |
| Zone 8 | Mid-March to early April | January to early February |
Local frost dates vary, so confirm the real one before sowing.
How to Grow Bell Peppers From Seed: Supplies and Sowing Step by Step
Gather these first:
- Sterile seed-starting mix, never garden soil.
- Trays or cups with drainage holes (recycled yogurt cups work).
- A heat mat.
- A grow light and a spray bottle for gentle watering.
- Labels, since planting bell pepper seeds from three varieties gets confusing, and in my experience everyone forgets which is which.
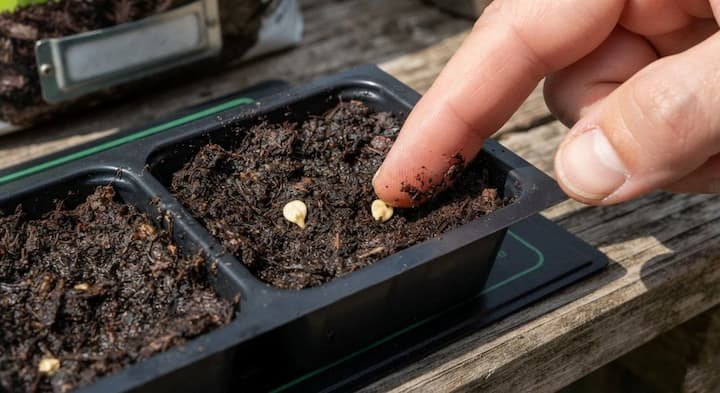
Pre-moisten the mix in a bucket until it feels like a wrung-out sponge. Fill the cells, press lightly, and drop in 2 to 3 seeds per cell, 1/4 inch deep (some guides say 1/2 inch, but 1/4 is plenty).
Sow a few extra cells too. Cover with a thin layer of mix, mist, and top the tray with a clear humidity dome or plastic wrap.
Germination: Heat, Moisture, and How Long It Takes
Bottom heat does most of the work. Hold the soil at 80°F to 85°F and most seeds sprout in 7 to 14 days. Without a mat, expect 14 to 21 days. Keep the mix damp, not soggy, and skip the light until green shows. Uneven sprouting is normal and hot varieties can take a month, so leave the tray alone. Reseed any cells still empty after 3 weeks.
Direct sowing outdoors rarely works because soil stays cold for too long in most of the country. Unless the ground already holds 65°F, as in USDA Zones 9 through 11, start bell pepper seeds indoors.
Caring for Bell Pepper Seedlings After They Sprout
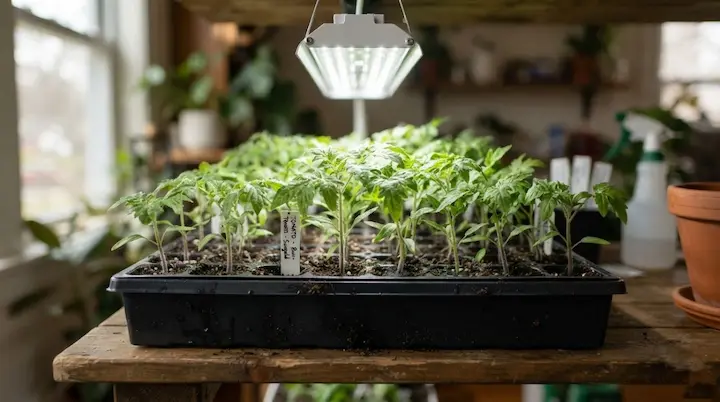
The moment green shows, pull the dome and run the lights 14 to 16 hours a day.
Distance depends on the light: fluorescent tubes sit 2 to 3 inches above the tops, while LED panels usually sit 12 to 18 inches up, so follow the label. Water from the bottom and let the surface dry a bit between drinks.
Ohio State University Extension recommends about 70°F days and 65°F nights for stocky indoor seedlings. A small fan on low for a few hours a day also toughens stems.
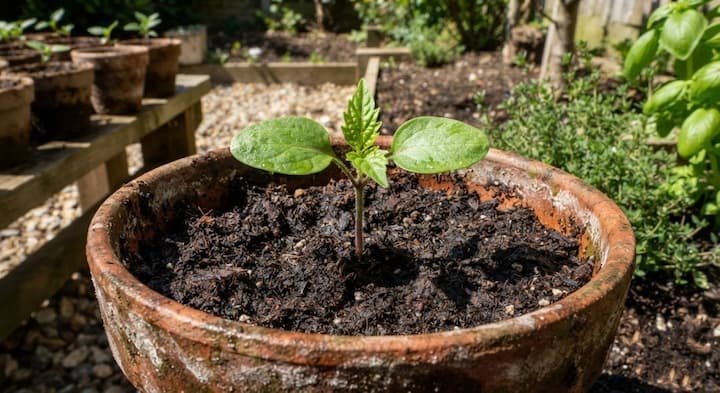
The first rounded leaves are the cotyledons, or seed leaves. True leaves come next and look like tiny pepper leaves. Once the first true leaves open, thin to the strongest seedling per cell by snipping the extras at the soil line, since pulling can wreck neighboring roots. Start feeding with quarter-strength liquid fertilizer every 2 weeks.
Potting Up Seedlings Into Bigger Pots
Once the second set of true leaves shows up, move each seedling into a 3 to 4 inch pot. Hold it by a leaf, never the stem, since a leaf can regrow and a crushed stem cannot. Set it at the same depth as before. Unlike tomatoes, peppers gain nothing from a buried stem.
Common Seedling Problems and Fixes
- Nothing sprouts: soil is too cold or the seed is old. Check the heat and run a germination test.
- Tall and spindly: not enough light. Lower the light or upgrade it.
- Seedlings collapse at the soil line: damping-off, a fungus that loves soggy, stagnant conditions. Water from the bottom, add airflow, and use fresh sterile mix.
- White fuzz on the soil: too wet. Let the surface dry and move more air.
- Tiny flies: fungus gnats, drawn to wet soil. Let the top inch dry out and add yellow sticky traps.
- Purple tint: usually cold roots. Warm up the room.
- Yellow leaves or brown edges after feeding: fertilizer burn. Water through the pot and cut back.
Hardening Off Before the Move Outside
Start 7 to 10 days before the planned transplant date. Skipping this step is how a lot of plants get shocked and stall.
- Days 1 to 3: set bell pepper seedlings in shade for 1 to 3 hours, out of wind.
- Days 4 to 6: morning sun for 4 to 6 hours.
- Days 7 to 10: full sun most of the day, then overnight if nights stay above 55°F.
When and Where to Transplant
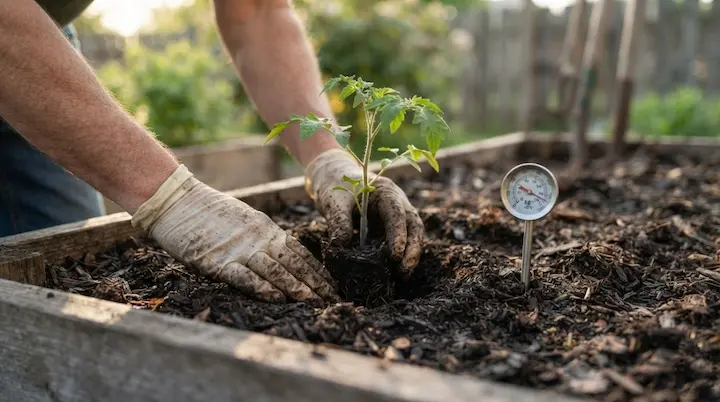
Wait until the last frost is behind and nights hold above 55°F. Soil should read at least 65°F on a soil thermometer, and black plastic laid down a week or two early warms it faster. Zone details live in this when to plant guide.
Some guides say 50°F nights are fine, but 55°F is the safer floor. Growth stalls once soil passes 85°F.
Pick a well-draining spot with 6 to 8 hours of direct sun. Work 2 to 4 inches of compost into the bed and aim for soil pH between 6.0 and 6.8; a $15 test kit settles it. Lime raises a low pH, sulfur lowers a high one, and fresh manure burns roots, so skip it.
A good soil mix matters just as much in beds as in pots. Raised beds warm sooner and drain better in USDA Zones 4, 5, 6 and 7, where row covers help too. Space plants 18 to 24 inches apart, as covered in this raised bed spacing guide.
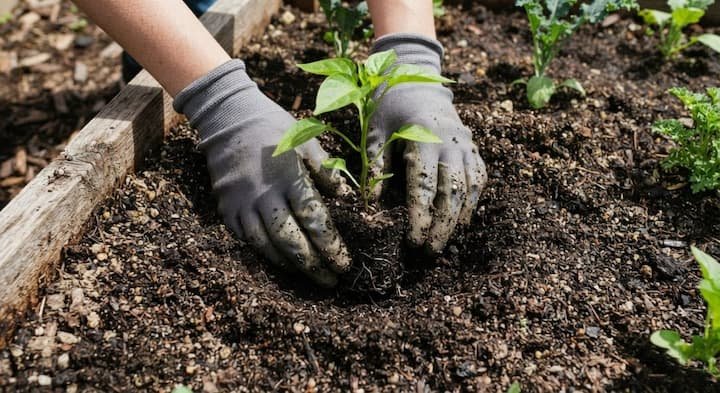
Plant at the same depth as the pot, add a spoonful of bone meal, and water well.
Rotate crops too: skip any spot that held tomatoes, potatoes, or eggplant last season, since they share diseases. Basil and marigolds make better neighbors, and more companion plants are listed in another guide.
Growing Bell Peppers in Containers and Indoors
- Container: 5 gallons minimum, 7 to 10 gallons for bigger plants, always with drainage holes.
- Grow bags: 3 to 5 gallon fabric bags dry faster and stop roots from circling. See growing in pots for the full setup.
- Indoor light: LED for 12 to 16 hours daily.
- Indoor climate: 70°F to 85°F days and 40% to 60% humidity. Dry winter air invites spider mites.
- Pollination: no bees indoors, so shake each flowering stem every morning or move pollen with a small paintbrush.
Watering, Mulching, Feeding, and Support
- Water: 1 to 2 inches a week, delivered steadily. Push a finger 1 inch into the soil; dry means water, damp means wait. Water deeply in the morning. Wilting that clears by evening means thirsty; yellow lower leaves in wet soil mean too much. The how often to water guide has a full schedule.
- Mulch: 2 to 3 inches of straw once soil reaches 70°F, with drip lines or soaker hoses underneath to keep leaves dry.
- Feeding: balanced 10-10-10 starting 2 weeks after transplant, then lower nitrogen like 5-10-10 every 2 to 3 weeks once flowers appear, since too much nitrogen builds leaves instead of peppers. Ease off late in the season. See the best fertilizer picks.
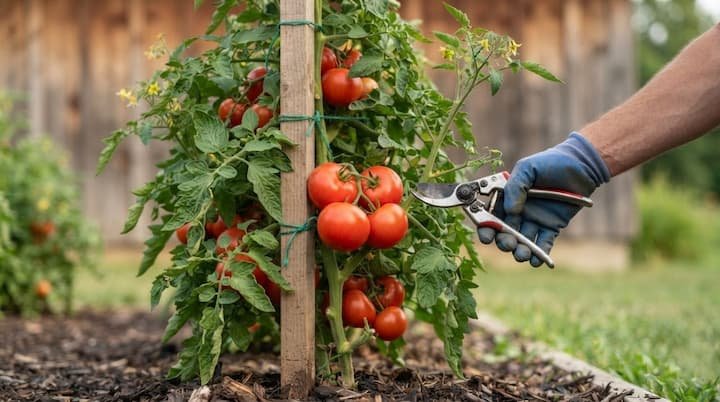
- Support: set a stake or small cage at transplant. Tie stems loosely every 8 to 12 inches. Driving one in later damages roots, and a plant holding 2 to 3 pounds of fruit needs it.
Flowers, Pollination, and Blossom Drop
Blossoms drop when days pass 90°F or nights fall below 55°F. Patience usually fixes it once the weather settles, and 30% to 40% shade cloth helps in heat waves.
I like to pinch the first few flowers off small transplants so the plant builds roots before fruit. Outdoors, wind and bees handle pollination, though a gentle stem shake on calm days helps.
Pests and Diseases
- Aphids: blast them off with water, then use insecticidal soap or neem oil if they return. Curling leaves can point here, and this leaves curling guide covers other causes.
- Hornworms: handpick them. Bt works for heavy infestations.
- Spider mites: they love hot, dry spells. Spray leaves with water and raise humidity.
- Blossom end rot: dark, sunken spots on the bottom, a calcium problem from uneven watering, not a disease. Calcium sprays on leaves do not help.
- Bacterial leaf spot: brown spots with yellow halos. Skip overhead watering, use disease-free seed, and pull infected leaves.
- Sunscald: pale, papery patches. Keep leaf cover and use shade cloth.
Marigolds and alyssum bring in ladybugs and lacewings, which eat aphids.
Seed-to-Harvest Timeline
Here is how a full season of growing bell peppers from seed lines up:
- Weeks 1 to 4: germination and first true leaves. Top growth looks slow while roots build.
- Weeks 4 to 8: stems and leaves fill out. Pot up and start feeding.
- Weeks 8 to 10: harden off and transplant.
- About 4 weeks after transplant: small white flowers appear at branch joints.
- Fruit sizes up 45 to 55 days after flowering. Green peppers are usually ready 60 to 70 days after transplanting, and colored types need 2 to 3 weeks more.
Harvesting and Storing Bell Peppers
Harvest by these signs:
- Green: 3 to 4 inches across, firm and glossy. Green is just unripe, and the sweet flavor builds with color.
- Red, yellow, or orange types: wait until 75% to 90% of the color has changed. This can take several weeks.
- Overripe: soft spots or wrinkled skin.
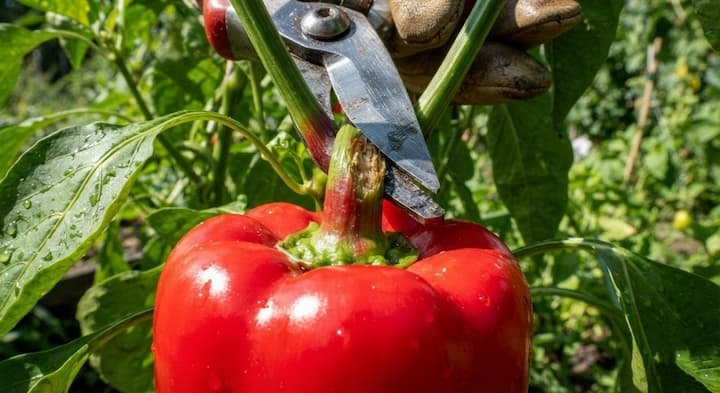
Use clean pruners or scissors and cut the stem 1/2 inch above the fruit, since pulling tears branches. I harvest in the morning, when plants are full of water.
Pick every 3 to 4 days, because leaving ripe fruit slows new flowers. If peppers just sit green, read why not turning red happens. Unwashed peppers keep 1 to 2 weeks in the refrigerator crisper. Green ones left on the counter slowly color up. A plant keeps producing 30 to 45 days after the first pick.
End of Season: Overwintering and Saving Seeds
Before the first fall frost (32°F), cover plants on cool nights, or dig up healthy ones and bring them indoors. The steps are in this overwinter pepper plants walkthrough.
For next year’s seed, mark the best plant, let a few peppers ripen fully on the vine, and follow the drying steps above. Stick to open-pollinated types, since hybrids will not copy themselves.
Final Thoughts:
That covers how to grow bell peppers from seed, start to finish. I think warmth is the biggest win: a heat mat early, warm soil at transplant, and steady water after that. Pick a variety, sow on time, harden off slowly, and the backyard pays back with thick, sweet peppers by late summer. Start a few seeds this season and keep notes for next fall.
Pingback: When to Plant Peppers: Best Dates by Zone (Proven Guide)
Pingback: Best Fertilizer for Pepper Plants: Proven Picks & Tips!
Pingback: Growing Bell Peppers in Pots: Tips for Big Yields
Pingback: How to Prune Pepper Plants: 5 Simple Steps for More Fruit
Pingback: 25 Bell Pepper Companion Plants: Proven Picks That Work
Pingback: How Often to Water Pepper Plants: Complete Proven Guide
Pingback: How to Overwinter Pepper Plants: 4 Proven, Easy Methods