I still remember the first time I tried to propagate plants in water. I had a leggy pothos that looked half dead, and instead of throwing away the trimmings, I stuck a few cuttings in an old pickle jar on my kitchen windowsill. Two weeks later, I had tiny white roots poking out, and I felt like I had discovered some kind of secret.
Since then I have propagated close to forty different plants this way, given away a dozen baby pothos to neighbours, and killed my fair share of cuttings too, mostly because I was impatient or lazy about changing the water. This guide is everything I wish someone had told me when I started. No fluff, just what actually works, what does not, and the small mistakes that quietly ruin a cutting before you even notice.
Why Water Propagation Is Worth Trying
If you have never tried it, propagating houseplants in water is probably the easiest way to grow your plant collection without spending a rupee. You do not need soil, pots, or any special tools. A cutting, a jar, and some patience is really all it takes.
What I like most about it is that nothing is hidden. In soil, you cannot tell if a cutting is rooting or quietly rotting underground. In water, you see everything happening in real time, which makes it a great way to learn how roots actually grow. It is also the reason so many beginners start here before moving on to soil propagation or other methods.
There is a small myth I want to clear up though. Roots that grow in water are not a different type of root than the ones that grow in soil. They are just adapted to that environment, which is why a water-rooted cutting needs a bit of a transition period before it settles happily into a pot.
Another reason I keep coming back to this method is cost. Buying a new plant every time you want one more pothos or philodendron adds up quickly, whereas learning to propagate plants in water lets you multiply what you already own for the price of a jar. It is also a lovely thing to do with kids, since watching roots appear over a couple of weeks holds their attention far better than most screens do.
What You Actually Need to Get Started
You genuinely do not need much. Here is my short list, none of it expensive:
- A clean, clear glass jar or small vase.
- A pair of sharp scissors or garden snips.
- A healthy parent plant with a few stems to spare.
- A spot with bright, indirect light.
- Patience, more than anything else on this list.
If you want to make it look a little nicer on a shelf, a proper propagation station with multiple slots works well too, but it is not necessary. I used old spice jars for my first two years of doing this and had just as much success as friends who bought fancy setups.
Which Plants Actually Root Well in Water
Not every houseplant is a good candidate. Stem and vine type plants with visible nodes are your best bet. Succulents, snake plants, and ZZ plants, on the other hand, tend to turn mushy and rot if you try this method with them, so I would avoid those completely.
Here are the plants I have had the most consistent success with, along with roughly how often you should be changing their water, since this actually varies more than most people realise.
| Plant | Rooting Time | Water Change Frequency | Notes |
|---|---|---|---|
| Pothos | 1–2 weeks | Every 7 days | Almost impossible to mess up |
| Heartleaf Philodendron | 2–3 weeks | Every 7 days | Very similar to pothos |
| Tradescantia | 1–2 weeks | Every 5 days | Roots fast but water turns cloudy quickly |
| Monstera (with node) | 3–5 weeks | Every 10 days | Needs patience, use a stake for support |
| Spider Plant Pups | 2–3 weeks | Every 7 days | Move to soil sooner rather than later |
| Syngonium | 2–3 weeks | Every 7 days | Underrated, roots reliably |
| Lucky Bamboo | 4–6 weeks | Every 14 days | Can live in water permanently |
| Peperomia | 3–6 weeks | Every 10 days | Slower, thicker cuttings root better |
Notice that tradescantia needs fresher water more often than something like lucky bamboo. This is something a lot of general guides skip over, but it genuinely changes how successful your cutting will be. A plant with soft, fast-growing stems tends to release more organic matter into the water, so the water fouls up quicker.
Step by Step: How to Propagate Plants in Water
This is the exact process I follow every single time, and it has not failed me once I got the details right:
- Pick a healthy stem. Look for something green, firm, and free of damage. Avoid old, woody, or yellowing growth.
- Find a node. This is the little bump or ridge on the stem where a leaf meets it. This is where new roots will actually form, so your cutting needs at least one.
- Make the cut. Using clean, sharp scissors, cut about half an inch below the node.
- Strip the lower leaves. Any leaf that would sit underwater will rot and spoil the whole jar, so remove those, leaving two or three leaves on top.
- Place it in water. Use a clear jar so you can keep an eye on things. The node should be fully submerged, but the leaves should stay above the waterline.
- Find it a bright spot. Somewhere with indirect light works best, like a few feet back from an east or north facing window. Harsh direct sun will heat up the water and stress the cutting.
- Wait, and refresh the water on schedule. This is the step most people skip, and it is exactly why their cuttings fail.
I know that sounds simple, and honestly it is. The part people struggle with is not the cutting itself, it is the discipline of actually changing the water on time.
Choosing the Right Container and Water
A lot of people overthink the container. In my experience, any clear glass jar works fine, from an old jam jar to a proper propagation station if you want something that looks nicer on a shelf. The only real requirement is that it is tall enough to keep the cutting upright and the node underwater without the leaves touching the surface.
As for water, plain tap water is fine for most plants. If your tap water is heavily chlorinated, let it sit out overnight before using it so the chlorine can dissipate. I personally use filtered water for anything slow-rooting like peperomia, just because I have noticed slightly better results, though I could not tell you the exact science behind it.
Room temperature water works best. Cold water can shock the cutting and slow things down, while very warm water encourages bacteria and algae to grow faster than you would like.
How Long It Actually Takes And Why Winter Is Slower
Most fast rooters like pothos and tradescantia will show visible roots in one to two weeks under good conditions. Slower plants like monstera or peperomia can take anywhere from three to six weeks, and that is completely normal, so do not panic if nothing seems to be happening yet.
Something that rarely gets mentioned is how much the season affects this. When I propagate plants in water during summer, roots show up noticeably faster, sometimes in half the time compared to winter. Plants naturally slow down growth in colder months with lower light, so a cutting taken in December might take twice as long as the same cutting taken in June. If you are propagating in winter, do not be discouraged by the slower pace, it does not mean you are doing anything wrong. A small heat mat under the jar, or simply moving it closer to a light source, can help speed things along a little.
Should You Add Fertiliser to the Water?
This is a question I get asked a lot, and the honest answer is that it depends. In plain water, a cutting can survive for weeks on the energy stored in its own stem and leaves, so fertiliser is not strictly necessary just to get roots started.
That said, once roots begin forming and the cutting starts using up its stored energy, a very light feed can help. I add about one quarter of the usual liquid fertiliser dose, roughly a quarter teaspoon of a balanced liquid feed per litre of water, once every second or third water change. Any stronger than that and you risk burning the fragile new roots, which is worse than not feeding at all. If you are a beginner, I would honestly say skip the fertiliser altogether for your first few attempts and just focus on clean water and good light.
Moving Water Roots into Soil
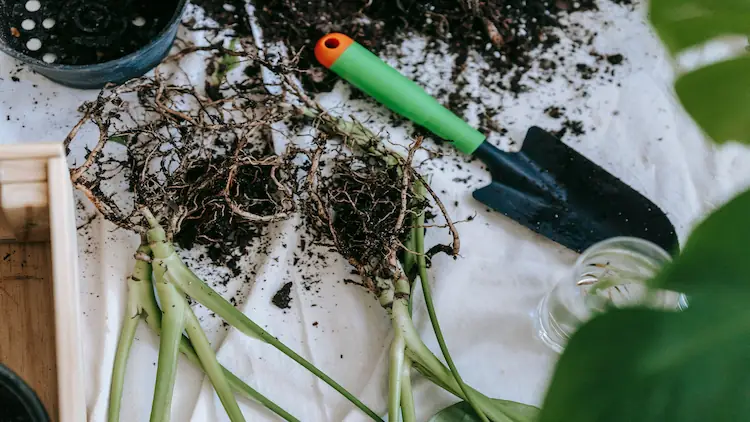
The biggest mistake I made early on was potting up too soon. Wait until the roots are at least 1 to 2 inches long, and ideally you want to see several roots rather than just one thin strand.
- Use a small pot with drainage holes, nothing oversized.
- Mix regular potting soil with perlite in a 2:1 ratio for good drainage.
- Water lightly right after transplanting, then keep the soil just barely moist for the first week or two.
- Keep the newly potted plant somewhat shaded for a few days to reduce the shock of switching mediums.
Water roots are more fragile than soil roots, so handle them gently during this move. I usually see a little bit of drooping in the first two or three days after transplanting, and that is normal. As long as it perks back up within a week, the plant is settling in fine.
Can You Keep Plants in Water Forever? (Semi-Hydro Option)
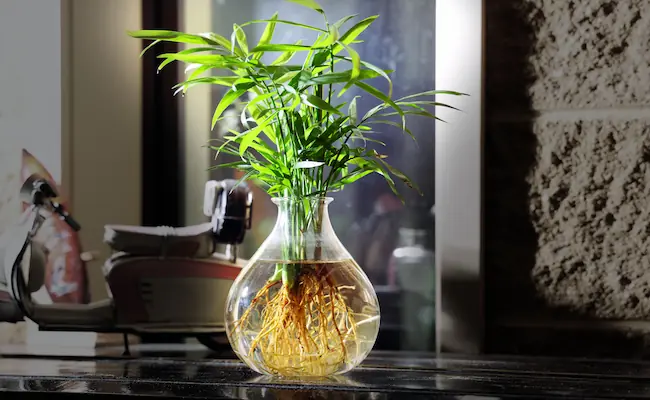
Not every cutting needs to go into soil at all. Some plants, pothos and lucky bamboo especially, are perfectly happy living in water long term, provided you keep feeding them a very diluted liquid fertiliser and changing the water regularly.
If you like the look of water-grown plants but want something a bit more stable than a jar, semi-hydroponics is worth trying. This basically means potting the rooted cutting into a net pot filled with clay pebbles, called LECA, and sitting that net pot inside a container with water filled about a third of the way up.
The roots grow down into the moisture without sitting fully submerged, and the plant gets both air and water at the roots at the same time. I switched a couple of my pothos over to this setup a while back, mainly because I got tired of changing jar water every week, and honestly the maintenance dropped a lot once they were established.
This is a nice middle path if you want to permanently propagate plants in water without going through the soil transition at all.
Common Problems and How I Fix Them
- Stem turning mushy or black: This is rot, almost always caused by a leaf sitting in the water or water being changed too infrequently. Cut back to healthy tissue above the damage and start fresh in a clean jar.
- Cloudy or smelly water: Bacteria has built up. Rinse the jar properly, not just refill it, and go back to a stricter water change schedule.
- Algae growing in the jar: Usually caused by too much direct sunlight. Move the jar to a spot with bright but indirect light, or use an opaque container instead of a clear one.
- No roots after a long time: Check that your cutting actually has a node. Without one, roots simply will not form no matter how long you wait.
- Roots growing but no new leaf growth: This often means it is time to pot up. Once roots reach a good length, they cannot keep drawing energy from water alone forever.
Final Thoughts :
Once you have done it a few times, the whole process becomes second nature. Snip a healthy stem below a node, strip the lower leaves, drop it in a clean jar of water, set it somewhere bright, and stay consistent with changing the water. That last part is honestly the whole game. Most failed cuttings I have seen, mine included, come down to water that sat still for too long rather than anything more complicated.
Start with something forgiving like pothos before moving on to trickier plants. Once you get the hang of it, you will probably end up with more baby plants than you know what to do with, which, in my experience, is a pretty good problem to have.