I’ve killed my share of tulips over the past six years, and every single time it started with the leaves turning yellow before I even noticed anything else wrong.
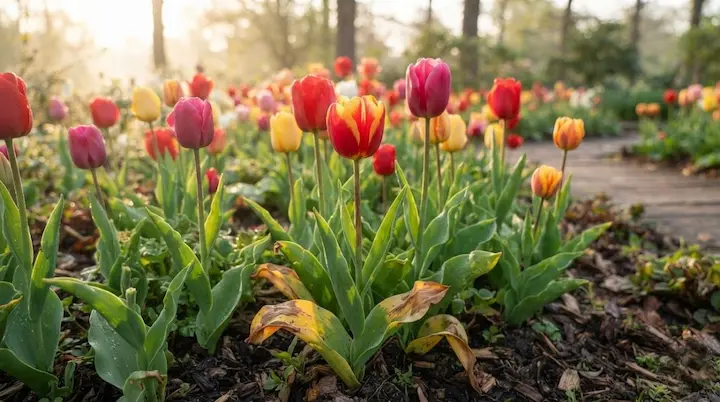
If your tulips turning yellow has you worried, don’t panic yet it’s almost always fixable once you know exactly what’s behind it, and that’s what we’re breaking down below.
Is Yellowing Normal, or Is Something Wrong?
Not all yellow foliage is bad news. Once a tulip finishes blooming, the plant shifts its energy back into the bulb for next season, and the leaves naturally yellow and die back over roughly 4 to 6 weeks. That part is completely normal.
The real trouble starts when leaves yellow before or during bloom – that’s your plant flagging a problem.
| Situation | Normal Timing | Watch For |
|---|---|---|
| Garden bed tulips | Yellowing starts 4–6 weeks after bloom | Yellowing before flowers even open |
| Container or pot tulips | Same general timeline | Soggy soil, since pots drain less evenly than a yard bed |
| Forced or store-bought bulbs | Foliage yellows faster, within 2–3 weeks post-bloom | Bulb usually won’t rebloom reliably outdoors |
Check Your Tulips In This Order
Every gardener asks “why are my tulips yellow” at some point, and honestly the answer is almost always sitting in the soil or the sky above your bed.
Here’s the order I check things in:
- Look at the soil first – soggy, bone-dry, or just right?
- Note where the yellowing starts – leaf tips, the base, or between the veins?
- Feel the leaf texture – mushy and wet points to rot; dry and crispy points to underwatering or heat stress
- Check the bulb itself if whole leaves are collapsing, not just yellowing
- Check the undersides of leaves and the soil around the bulb for pests
Here’s a quick reference once you’ve spotted the pattern:
| Yellowing Pattern | Likely Cause |
|---|---|
| Leaf tips go first | Underwatering or fertilizer burn |
| Base of the leaf goes first | Overwatering or root rot |
| Between the veins, veins stay green | Iron or magnesium deficiency |
| Whole leaf turns yellow evenly | Nitrogen deficiency, or natural aging if it’s post-bloom |
| Streaky, broken color on the petals plus yellow leaves | Tulip breaking virus, not a care mistake |
The Real Causes Behind Tulips Turning Yellow
Here’s the exact order I check when tulip leaves turning yellow shows up out of nowhere in my yard:
- Overwatering: the number one culprit. Tulips want about 1 inch of water a week, tops. Waterlogged roots can’t breathe, and it’s honestly the same root rot in houseplants issue that shows up as mushy, yellow leaves across dozens of plant species.
- Underwatering: less common, but skipping water for weeks dries out the bulb underground before you notice anything above soil.
- Wrong light levels: tulips need at least 6 hours of direct sun. Too little, and photosynthesis slows, so leaves stay pale or yellow instead of green. Too much intense heat can scorch and yellow them too.
- Temperature swings: a heat spike above 85°F combined with wet soil cooks the roots fast. A hard freeze below 28°F on new growth causes damage too.
- Poor drainage: heavy clay holds water around the bulb long after rain stops.
- Wrong soil pH: tulips like a pH between 6.0 and 7.0. Alkaline, “sweet” soil locks up nutrients the plant needs.
- Nutrient deficiency: the tulip leaf yellowing piece is usually the easiest fix once you’ve got a soil test in hand (see table below).
- Shallow planting: bulbs need to sit 6 to 8 inches deep. Shallower planting exposes them to temperature swings.
- Infected or low-quality bulbs: bargain-bin bulbs sometimes carry rot from the start.
- Bad vernalization: forced bulbs need 6 to 8 weeks of cold, ideally around 40°F to 45°F, before they’ll perform right.
- Pests: nematodes, mealybugs, stem borers, and even rabbits stress the plant enough to trigger yellowing.
- Disease: bacterial soft rot, botrytis blight, and tulip breaking virus all cause yellowing, though breaking virus usually shows up as streaky color changes on the petals more than the foliage.
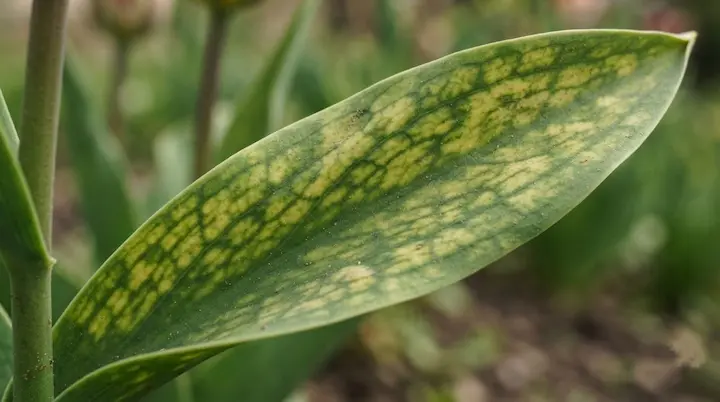
Yellowing vs. virus – here’s the tell:
ordinary chlorosis spreads evenly across a leaf and stays on the foliage. Tulip breaking virus instead paints feathery, broken color streaks onto the flower itself, on top of yellowing leaves. If you see both at once, dig up and get rid of the bulb – there’s no cure, and aphids will carry it to the rest of the bed.
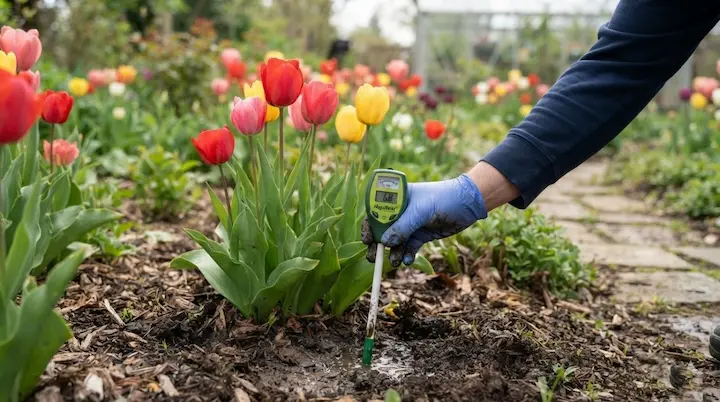
I like starting with a soil moisture check before touching fertilizer – it rules out the most common cause first.
Nutrient deficiency patterns:
This is genuinely useful once you know it.
| Nutrient | Where Yellowing Shows Up First |
|---|---|
| Nitrogen | Older, lower leaves turn yellow first; new growth stays green |
| Iron | New growth yellows between the veins, veins stay green |
| Magnesium | Yellow patches between veins on older leaves |
| Phosphorus | Older leaves turn yellow-purple and growth stalls |
According to research on plant chlorosis from UC master gardeners, the exact pattern of yellowing whether older leaves go first or the color loss shows up between the veins is one of the most reliable ways to identify a missing nutrient without a lab test.
This isn’t just a tulip problem, by the way. I’ve seen this same interveinal yellowing on a spider plant, an orchid, a peace lily, and a pothos on my windowsill, and even on sunflower leaves out in the vegetable rows.
Test Before You Treat
- Soil moisture meter: the cheapest way to confirm overwatering without guessing.
- Finger test: push a finger about 2 inches down; dry means water, damp means wait.
- pH test kit: a $10 kit tells you whether to adjust before adding any fertilizer. In my experience, this step alone saves you from wasting money on the wrong fix.
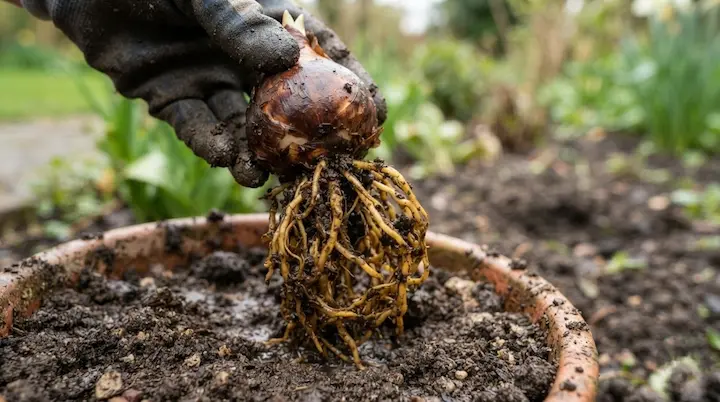
- Bulb check: if leaves are collapsing, dig gently and feel the bulb; firm is fine, mushy or soft means it’s rotting.
How To Fix Each Cause
- Overwatering: stop watering until the topsoil dries out, improve drainage.
- Underwatering: water deeply once a week, about half a gallon per plant.
- Light: move containers, or trim back branches shading the bed.
- Temperature swings: mulch to buffer heat spikes, or throw a cover over new growth ahead of a hard freeze.
- Poor drainage: mix in coarse sand or move the bed into raised rows.
- Nutrients: apply a balanced 10-10-10 fertilizer or work in finished compost.
- Wrong pH: add sulfur or peat moss to lower it, wood ash to raise it.
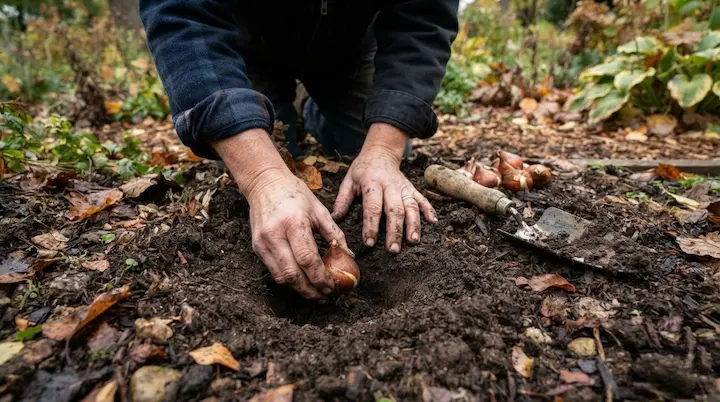
- Shallow planting: replant at 6 to 8 inches deep next fall.
- Infected or low-quality bulbs: discard them and avoid replanting tulips in that same spot for 2 to 3 years.
- Bad vernalization: chill next season’s bulbs properly at 40°F to 45°F for 6 to 8 weeks before forcing.
- Pests or disease: remove affected foliage and treat healthy plants with neem oil.
The First 48 Hours
- Stop watering immediately if the soil is soggy.
- Move the pot or rig up temporary shade if sunburn looks like the cause.
- Pull any collapsed, mushy foliage by hand – it won’t recover.
- Hold off on fertilizer if you suspect root damage; wait until the roots stabilize.
When To Really Worry
Yellow tulip leaves that go mushy or foul-smelling overnight are a genuine red flag, not routine chlorosis.
- More than 30% of the foliage yellow before bloom – dig up and check the bulb.
- Mushy, foul-smelling bulbs – toss them in the trash/garbage, never the compost bin.
- Rapid, whole-plant collapse in a day or two – likely disease; pull the plant to stop it spreading to its neighbors in the bed.
Should You Cut The Yellow Leaves?
- Natural post-bloom yellowing: leave it alone and let it die back; it’s still feeding next year’s bulb.
- Disease or pest damage: use clean pruners and cut only the affected leaves.
- Never cut leaves that are still partly green, even after the flower is long gone.
Preventing Yellow Leaves Next Year
- Buy bulbs from a real nursery, not a discount bin – it does your beds a favor for years to come, and plant them in fall.
- Fertilize on a schedule – once at fall planting with a bulb-specific or 10-10-10 blend, then again in early spring once shoots poke through.
- Get your tulips winter care routine right – proper mulch depth and timing set up strong spring growth.
- Keep an eye on cold snaps – knowing how to protect plants from frost fast can save an entire bed.
- Feed the soil, not just the plant – I make my own using tips from this guide on how to make compost at home, and I’m picky about what goes in my garden compost bin.
- Space bulbs 3 to 6 inches apart, or about 1 foot between rows in bigger beds, so airflow stays good in a crowded yard or backyard.
- Let bulbs go fully dormant through summer before you disturb them.
- In Zone 8 and warmer, dig bulbs once foliage dies back and store them somewhere cool and dry for 10 to 12 weeks before replanting, since natural winter chill isn’t cold enough there.
Care By Region and Zone
- Zones 4 and 5: harsher winters mean deeper planting and heavier mulch.
- Zones 6 and 7: fairly reliable tulip country; standard planting depth works fine.
- Zone 8: warmer regions may need pre-chilled bulbs since natural cold isn’t enough.
- If you’re a community gardener sharing plots and your neighbor’s tulips are yellowing too, it’s probably a shared drainage or pH issue, not bad luck on your end alone.
Final Thoughts:
At the end of the day, tulips turning yellow almost always comes down to water, light, soil, or timing – and once you match the leaf pattern to the right cause, the fix is usually simple. I think the biggest mistake gardeners make is guessing instead of testing the soil first. Do that, treat the actual problem, and your tulips should bounce back strong next spring.