
Most gardeners grab the fertilizer the second they see tomato leaves turning yellow, and that one move kills more plants than the yellowing ever does.
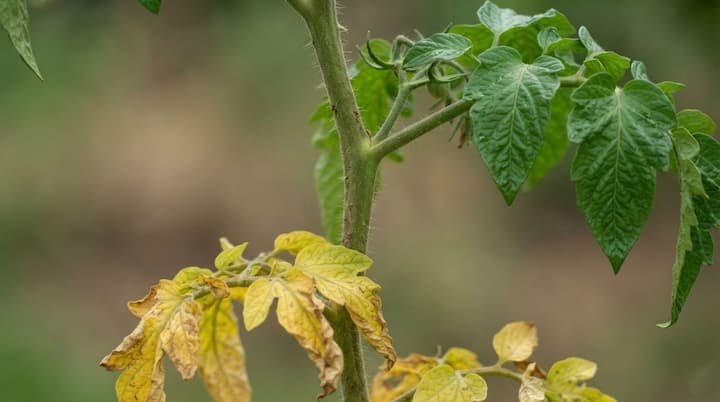
The same color can come from drowning roots, hungry soil, a fungus, or plain old age. Get the cause wrong and the fix backfires. Read the clues first, match them to the right problem, then treat it the right way.
When Yellow Leaves Are Totally Normal
Not every yellow leaf is a problem. I think half the panic posts in backyard garden groups are about leaves that were always going to drop. Yellow leaves on tomato plants are normal in these cases:
- Seed leaves: the first two leaves on a seedling (cotyledons) turn yellow and fall off. Nothing to fix.
- Bottom two or three leaves: the top stays green and keeps growing.
- End of the season: the plant puts its energy into fruit and drops old foliage. Trim the dying leaves and new tip growth so the last fruits ripen.
- Heavy fruit load: in late summer heat the plant pulls nutrients out of its oldest leaves.
On a big, mature plant in late summer, the lowest 6 to 8 leaves can yellow and still be normal. The line I use is simple. More than three leaves yellowing at once, or yellowing that climbs the plant, means something is off. In fall, USDA Zones 4, 5, 6, 7 and 8 all see natural yellowing as the season winds down, so check the calendar before you spray anything.
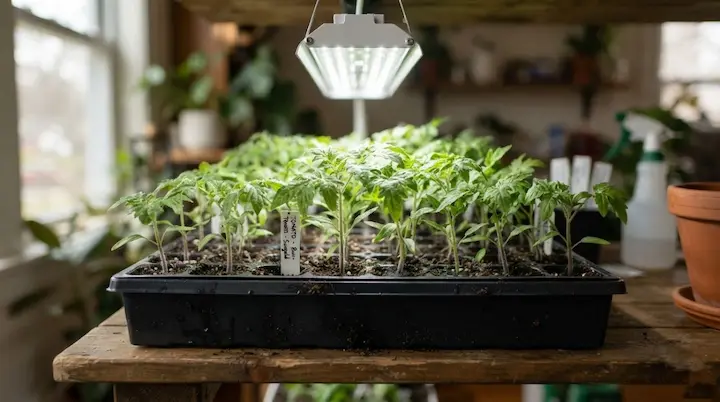
Young seedlings are a different story. If the true leaves go yellow, the usual causes are soggy mix, weak light, or no feeding once the first true leaves open. Fix: let the top of the mix dry out, move them under bright light, and feed with a half-strength liquid fertilizer.
Read the Pattern Before You Touch Anything
Why are my tomato leaves yellow? You can’t answer that until you check three things:
- Where: bottom, middle, new top growth, or one side only.
- What it looks like: even pale yellow, yellow with green veins, spots with halos, or tiny speckles. Look closely at the color.
- How fast: a slow creep over weeks, or a plant crashing in days.
Two quick tests help. Press a leaf. Soft and limp points to too much water, dry and crisp points to too little. Then cut a stem near the base and split it lengthwise. Brown streaks inside the center mean a vascular wilt. Clean green tissue means a watering or nutrient issue.
Quick Symptom Table for Yellowing Tomato Leaves
| What you see | Likely cause | Urgency |
|---|---|---|
| Bottom 1 to 3 leaves only, rest green | Natural aging | None |
| Soft, limp, pale leaves, wet soil | Overwatering | Medium |
| Older leaves evenly pale, slow growth | Nitrogen shortage | Low |
| Old leaves yellow between veins, veins green | Magnesium shortage | Low |
| Top leaves pale, veins green | Iron lockout from high pH | Low |
| Leaf edges yellow, then brown | Potassium shortage | Low |
| Spots with yellow halos on lower leaves | Early blight or Septoria | Medium |
| One side yellow and wilting | Fusarium or Verticillium wilt | High |
| Mosaic pattern, puckered leaves, or upward curling with yellow edges | Virus (mosaic or yellow leaf curl) | High |
| Fine speckles, webbing, sticky residue | Spider mites or whiteflies | Medium |
| Newest leaves bleached and twisted | Herbicide drift | Medium |
Watering, Drainage and Root Rot
In my backyard beds, overwatering has caused more yellow plants than every disease combined. A long rainy stretch can do the same thing even when you never overwatered.
Soggy soil pushes out the air, roots suffocate, and the plant can’t take up water or food. It looks thirsty, so people water more. Don’t water more just because tomato yellow leaves look wilted.
Tomatoes want 1 to 2 inches of water a week, applied slowly at soil level in the morning, and the top 1 to 2 inches of soil should dry out between drinks.
- Overwatered: soft, limp yellowing tomato leaves, wet soil, and wilting anyway. Fix: stop watering, let the soil drain, and water again only when the top 1 to 2 inches are dry.
- Underwatered: dry, papery leaves that yellow from the edges in. Fix: water deeply, then add a 2 to 3 inch layer of mulch to hold moisture.
- Compacted soil: roots can’t breathe. Stop walking on the bed, or move to raised beds or big pots. Fix: loosen the top few inches gently and mix in compost.
- Root rot: healthy roots are white and firm, rotted ones are brown and mushy. Caught early, plants often recover in two to three weeks once drainage improves. Badly rotted roots are tough to save. You can dig the plant up, trim the dead roots and replant in fresh soil, but if most of the root mass is gone, starting over is smarter. Our root rot guide shows how to check roots.
- Containers: they dry out and run low on food fast. Fix: repot into fresh mix, clear the drainage holes, dump the saucer, and remember potting mix runs low on nutrients after six to eight weeks.
- In-ground beds: they hold water longer, so poor drainage and compaction are the bigger risks.
Nutrient Gaps That Leave Tomato Leaves Turning Yellow
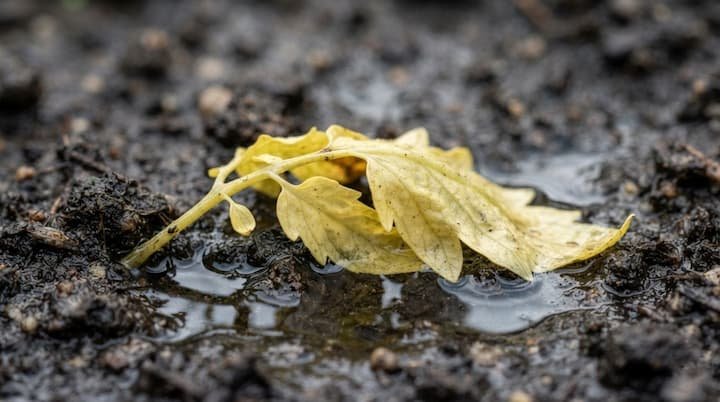
Tomatoes are heavy feeders. Texas A&M AgriLife Extension lists nitrogen as the most common nutrient cause, mostly because gardeners underfeed them. Older leaves go first since the plant moves nitrogen to new growth.
| Nutrient | Where it shows | Look | Fix |
|---|---|---|---|
| Nitrogen | Old leaves | Even pale yellow, slow growth | Balanced feed such as 10-10-10, see tomato fertilizer |
| Potassium | Leaf edges | Yellow, then scorched brown; yellow shoulders on fruit | Fertilizer higher in potassium (the last number), picked from your soil test |
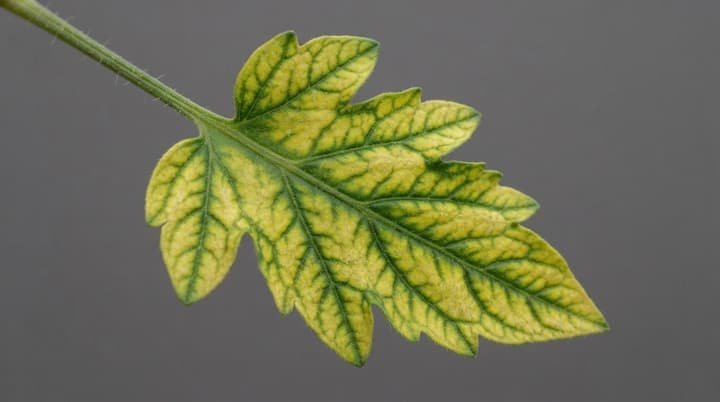
| Magnesium | Old leaves | Yellow between veins, veins stay green | Epsom salt, 1 teaspoon per gallon as a spray or 1 tablespoon per plant |
| Iron | New top leaves | Pale with green veins | Lower the soil pH, don’t just add iron |
| Calcium | New leaves | Yellowing on fresh growth | Even watering, right pH, soil test before adding calcium |
Micronutrient gaps like sulfur and zinc can also cause chlorosis (yellow tissue, green veins), and a soil test will catch them. Use Epsom salt only when magnesium is the problem. Guessing makes it worse.
Magnesium shortage shows up most in sandy soil, containers, heavy fruit set, acidic soil below pH 6.0, and beds loaded with potassium fertilizer. New growth should come in green within 10 to 14 days, but the leaves that already turned yellow won’t recover.
Soil Test, pH and Too Much Fertilizer
A soil test from your county extension office costs little and ends the guessing. A home test kit works for a quick pH check. Tomatoes like a pH of 6.2 to 6.8. Above 6.8, iron gets locked up even when the soil has plenty.
To raise a low pH, use garden lime. To lower a high pH, use elemental sulfur, and follow the rates on your soil test report. If the test comes back fine and the plant still yellows, look at watering and drainage, because damaged roots can’t move nutrients even when the soil has plenty.
Too much fertilizer is just as bad, since it burns roots and gives you big leaves with few tomatoes.
- Test once a year, in spring, before you feed.
- Feed container plants with a liquid fertilizer every two weeks.
- Side-dress in-ground plants once fruit sets, and water it in.
- Try compost tea as a gentle top-up.
- Stop feeding if you see crispy leaf tips or white crust on the soil, then flush the bed or pot with plain water, slow and deep, a few times.
Early Blight, Septoria and Powdery Mildew
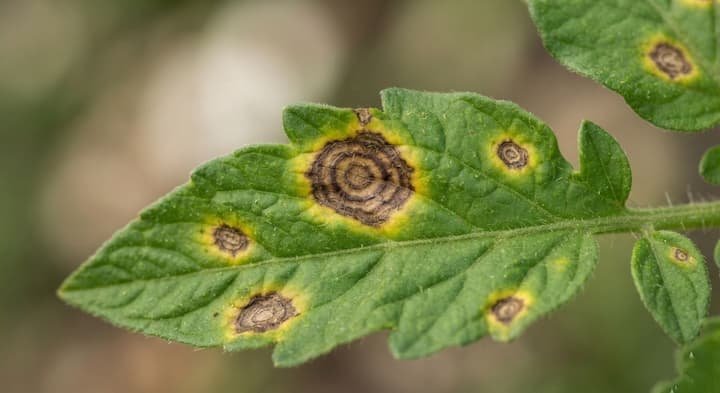
In my experience, early blight shows up every humid July in my yard, right on schedule. It starts on the lower leaves.
- Early blight: dark brown spots with target rings and a yellow halo, worst at 75°F to 85°F with wet leaves.
- Septoria leaf spot: lots of small spots with gray centers and tiny black specks inside.
- Powdery mildew: yellow patches on older leaves with a white-gray powder on top.
Skip overhead watering, since splashing water carries spores up from the soil. Pick off affected leaves and bag them in the garbage, never the compost. For powdery mildew, thin the plant for airflow and spray neem oil or a potassium bicarbonate product, following the label.
A copper fungicide every 7 to 14 days protects healthy leaves but won’t cure old spots. A 2 to 3 inch layer of mulch stops soil splash, which is how these spread. Heavy leaf loss also exposes the fruit to sunscald. All three are treatable if you catch them early. The next group is not.
Wilts, Viruses and Nematodes (the No-Cure List)
These can’t be treated, so catch them fast.
- Fusarium wilt: yellowing on one side first, brown streaks in the stem, and it favors soil above 80°F.
- Verticillium wilt: same streaks, but active in cooler soil under 75°F.
- Bacterial wilt: sudden yellowing and wilting in moist, sandy soil.
- Tobacco mosaic virus: mottled, puckered leaves. It spreads by touch, and tobacco carries it, so wash your hands before handling plants after a cigarette.
- Yellow leaf curl and tomato chlorosis virus: whiteflies carry them. Look for curled leaves and yellow margins, and control whiteflies early (see below). Chlorosis virus yellows the tissue between veins on lower leaves first and thickens them.
- Root-knot nematodes: stunting, yellowing and lumpy galls on the roots. Fix: pull the plant, grow N-labeled varieties, rotate beds, and solarize bare soil under clear plastic for several weeks in summer.
Pull the plant, bag it, and keep tomatoes, peppers, potatoes and eggplants out of that spot for 3 to 5 years. Next season, buy varieties labeled V, F, FF, N or T. Ask your local extension which Fusarium races are around. Some sources say a pH of 6.5 to 7.0 slows Fusarium, but iron gets harder to absorb above 6.8, so aim for about 6.5.
Spider Mites and Whiteflies
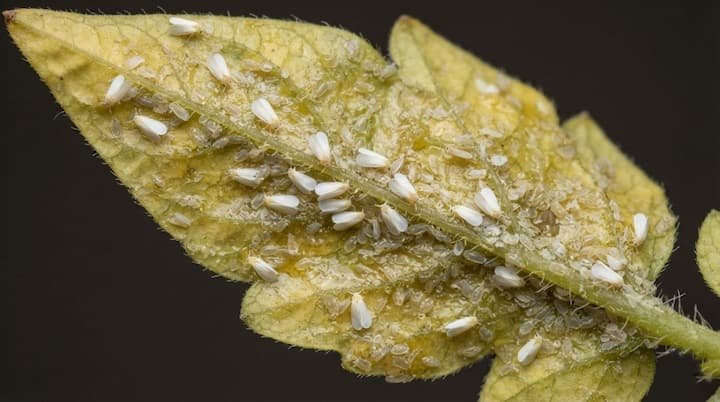
Flip the leaf over. Mites leave tiny pale dots, a dusty bronze look and fine webbing, and they favor hot, dry weather above 90°F, hitting water-stressed plants hardest.
Whiteflies fly up in a cloud when you shake the plant and leave sticky honeydew that grows black sooty mold. Spray insecticidal soap or neem oil on the undersides in the morning, three times, 5 to 7 days apart. Skip broad-spectrum sprays because they kill the ladybugs and lacewings that keep pests down.
Sun, Heat, Cold and Transplant Shock
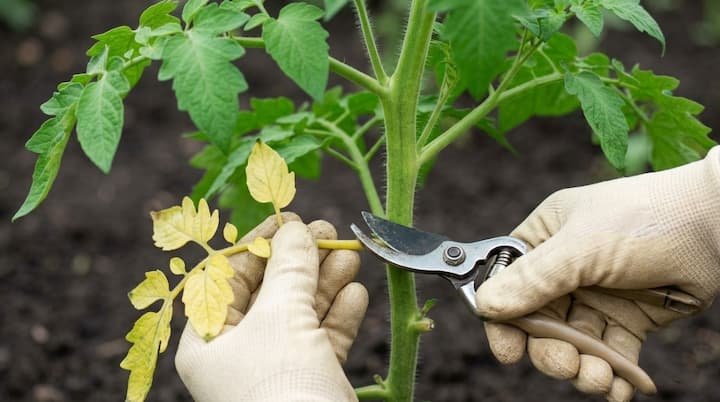
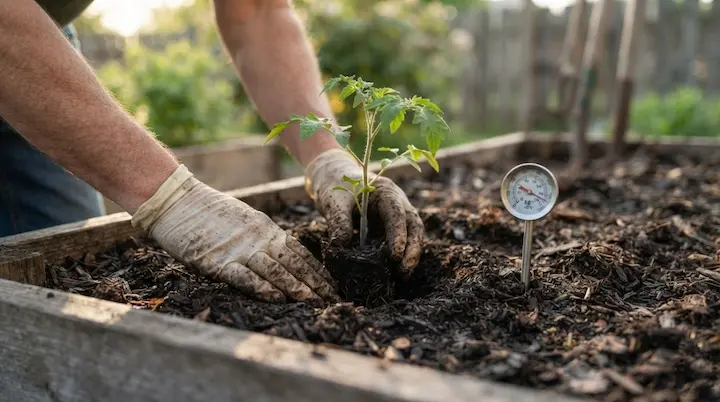
- Transplant shock: bottom leaves yellow a week or two after planting. Wait until the soil warms and nights stay above 50°F. Check when to plant for your zone, and start seeds indoors so transplants are sturdy. Strip the yellow bottom leaves at the stem so the plant puts its energy into new growth.
- Low light and crowding: shaded lower leaves yellow. Space plants 24 to 36 inches apart with rows 3 to 4 feet apart, give them 6 to 8 hours of direct sun, and remove leaves shading the lower stem.
- Heat: stretches over 90°F scorch and yellow leaves, especially in USDA Zones 7 and 8. Fix: afternoon shade cloth, mulch, and deep watering.
- Cold: nights under 50°F stall growth and fade the color, and cold soil slows root uptake too. Frost at 32°F kills the plant outright, a real worry in Zones 4 and 5. Fix: cover plants with row cover or plastic caps on cold nights.
- Wind: whipping leaves turn yellow and curl. Fix: stake or cage the plant and add a windbreak.
Herbicide Drift and Contaminated Compost
Tomatoes are touchy about weed killers. A neighbor spraying the lawn can send drift your way, and the newest growth comes in bleached, twisted and yellow. Manure and compost can also carry herbicide residue, which is a problem for any community gardener who shares a pile.
- Hand weed near beds instead of spraying.
- Ask where compost and manure came from before it goes in your yard.
- Test it first: grow a few bean or pea seeds in a pot of the mix. Twisted seedlings mean trouble.
- If plants got hit, water normally and give mild cases a few weeks to push out clean growth. Pull badly twisted plants, and ask your extension office before eating fruit from them.
- If your compost or manure fails the test, stop using it and start with clean mix.
- Build your own compost pile so you know what’s in it.
Fix Plan for Tomato Yellow Leaves and Recovery Time
- Diagnose with the symptom table.
- Change one thing, then wait 10 to 14 days. Diseases are the exception, act the same day.
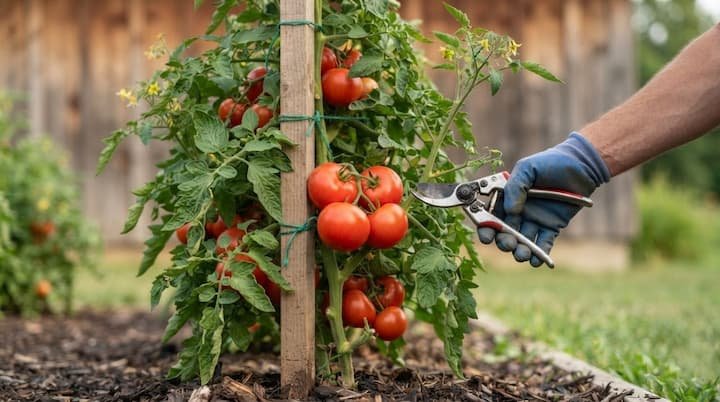
- Cut off yellow leaves at the stem. I like bypass pruners wiped with rubbing alcohol between plants. Take the yellow ones and leave the green, don’t strip the whole plant at once.
- Yellow leaves never turn green again, so judge progress by the new growth.
- Prune tomato plants up to the lower 6 to 8 inches for airflow.
- If you still can’t tell what it is, bring a leaf and stem sample to your county extension office or plant clinic.
- Pull the plant if you find stem streaks, mosaic patterns, or it keeps dropping leaves despite your fixes.
Nutrient fixes show in new growth in 7 to 14 days. Drainage fixes take two to three weeks.
Some guides say to try fixes until one sticks. I’d rather diagnose first, since feeding a drowned plant makes it worse.
Quick flow: bottom leaves only, leave it. Wet soil, water less. Pale and slow, feed. Spots, treat for fungus. One side wilting, cut the stem. Snap a photo of the leaf, compare it to the table, and print that table for the shed.
Organic vs Chemical Treatments and Fruit Safety
- Copper fungicide: protects against blight and Septoria, doesn’t cure. Follow the label.
- Chlorothalonil: a protectant, but check the label for home vegetable use and days before harvest.
- Neem oil and insecticidal soap: for mites and whiteflies, sprayed in the morning below 90°F.
- Epsom salt and balanced fertilizer: only for confirmed deficiencies.
- Compost tea: feeds the soil and perks up weak plants, but it won’t cure a disease.
Tomatoes from a plant with plain nutrient or watering problems are fine to eat. If you sprayed, wait out the days listed on the label, then wash the fruit.
Stop Yellow Leaves Before They Start
My experience is that a weekly five-minute walk down the rows beats any product.
- Choose resistant varieties (V, F, FF, N, T) and rotate beds every 3 to 5 years.
- Space plants 24 to 36 inches apart and strip the lower 6 to 8 inches of leaves.
- Water deep once or twice a week instead of a little every day.
- Feed on a schedule that follows your spring soil test.
- Mulch 2 to 3 inches deep and water in the morning.
- Plant companion plants like marigolds and basil nearby.
- Spring: test soil and plant once nights stay above 50°F.
- Early summer: mulch and side-dress.
- Midsummer: check leaf undersides and lower leaves for spots every week.
- In fall, clear spent vines, bag diseased ones in the garbage, and lay winter mulch over bare beds.
Final Thoughts:
Seeing tomato leaves turning yellow doesn’t mean your season is over. Check where the yellow starts, feel the soil, and change one thing at a time. Most backyard cases come down to water, food, or plain old age, and those are easy fixes. Save the pulling for wilt and virus. Watch the new growth, because that tells you whether the fix worked.
Pingback: Signs of Overwatered Tomato Plants & Proven Ways to Fix