
A tomato plant can be loaded with yellow flowers and still give you almost nothing to pick.
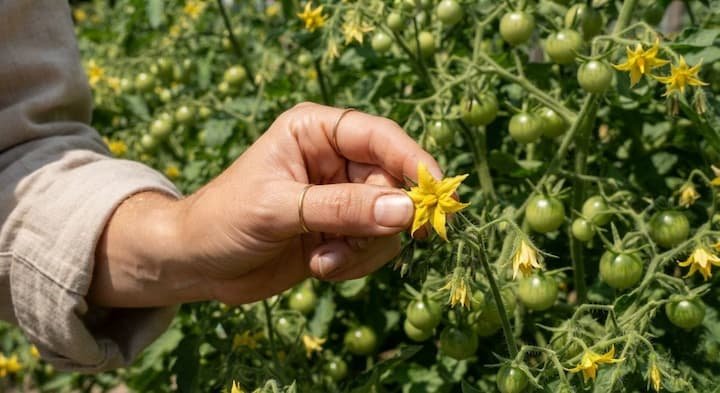
The flowers look fine, yet the pollen never lands where it should. Knowing how to hand pollinate tomatoes fixes this in about a minute per plant, with tools already sitting in your kitchen drawer. Here is what actually works, when to do it, and when it won’t help at all.
Do Tomatoes Really Need Help With Pollination?
Tomatoes are self-pollinating. Each flower is a “perfect” flower, meaning the male parts and the female part sit in the same bloom, so one plant can make fruit alone.
The pollen only has to drop from the anthers onto the stigma. Wind shakes the plant, gravity pulls pollen down because the flowers hang facing the ground, and bees add vibration.
Bumblebees do this with “buzz pollination,” shaking pollen loose with their flight muscles. I’ll be honest, I figured bees handled everything during my first season, and that was wrong.
Bees often skip tomatoes because the flowers make very little pollen and no nectar. Here is how it breaks down:
- Bumblebees: they visit tomato flowers and vibrate them, which is why greenhouses use them.
- Honeybees: they rarely bother, and they don’t vibrate the flower the same way.
- Other insects: ants, flies, and moths can move a little pollen too, just not reliably.
- No visitors at all: many plants still set some fruit on their own, just fewer than they could.
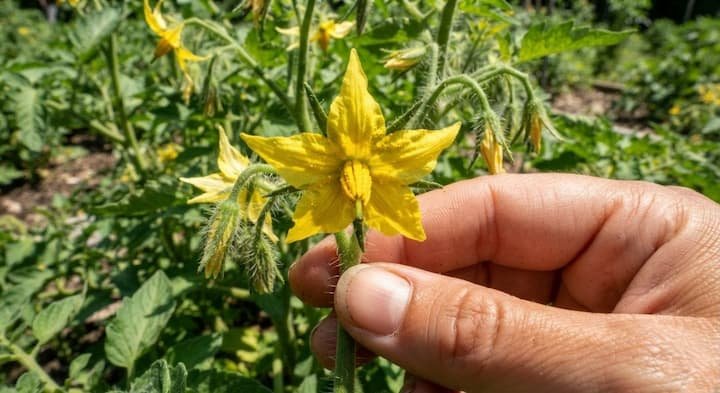
Tomato Flower Pollination Starts With Anatomy
Look inside an open flower and you’ll see a yellow cone in the center. That cone holds the pollen, and the female part, called the style, runs up through its middle. The stigma, the sticky tip of the style, sits at the tip of the cone or pokes just past it.
Pollen has to shake loose and land there. A tomato plant has no separate male and female flowers, so skip any advice telling you to find one of each.
A flower is ready when:
- The petals have curled back and the bloom is fully open.
- The flower is dry, with no dew or rain on it.
- You can see a little yellow pollen dust.
- It hasn’t started to shrivel.
When You Need to Pollinate Tomatoes by Hand
Giving your flowers a push can mean more fruit, better quality, true-to-variety fruit, less reliance on bees, and a safety net on calm or stormy days when pollinators stay hidden.
It makes the biggest difference in these spots:
- Plants growing indoors, on a windowsill, or under grow lights.
- A greenhouse, plastic tunnel, or row cover that blocks insects.
- A patio or balcony with no wind.
- A yard with few bees.
- Humid, muggy weather, when pollen clumps and won’t move.
- Very dry air, when pollen won’t stick.
It won’t help much in these cases:
- Plants hurt by pests or disease.
- Plants getting less than 8 hours of sun.
- Extreme heat or cold, which a brush can’t fix.
- Plants with no flowers, often from too much nitrogen.
Best Time of Day, Weather, and Temperature
Late morning to early afternoon is the sweet spot, once the flowers are open and dry. Skip early morning while dew is still on the blooms, and wait a couple of hours after rain. I usually head out around 11 a.m. on a warm, sunny day with humidity somewhere around 40% to 70%.
Temperature matters more than most people think. According to UC Master Gardeners, fertilization works best at 80°F to 85°F in the day with nights staying between 62°F and 72°F, while nights below 55°F or above 75°F interfere with pollen tube growth.
Your brush can’t change those numbers, so check the weather before you blame your technique.
Tools Comparison: What to Use and What It Costs
Prices below are typical ones. You probably own half of this list already.
| Tool | Cost | Best for | Watch out for |
|---|---|---|---|
| Finger | Free | A few plants, quick taps | Less vibration |
| Small paintbrush | $2 to $5 | Precise work in single flowers | Needs cleaning |
| Q-tip | $2 to $3 a box | Moving collected pollen | Tears flowers if pressed hard |
| Electric toothbrush | $5 to $15 | Humid days, sticky pollen | Keep bristles out of the bloom |
| Vibrating wand | $15 to $30 | Greenhouses, lots of plants | Costs more |
| Small fan | $15 to $25 | Indoor or enclosed spaces | Too much wind dries flowers |
You can find any of these at a garden center or hardware store.
How to Hand Pollinate Tomatoes: 8 Steps That Work
- Find ready flowers. Pick blooms that are fully open and dry, with petals curled back.
- Grab a tool. A small paintbrush, electric toothbrush, Q-tip, or your finger all work.
- Move it inside the flower. Swirl the brush tip around the yellow cone, or tap the base of the flower. Tomatoes don’t need pollen carried from one flower to another.
- Stay gentle. Use bare hands, since gloves make you clumsy. If you knock a flower off, the plant usually grows new ones within days.
- Repeat every 2 to 3 days while conditions stay good. Three days in a row also works. Start with the plants that need it most, like ones in a tunnel or big heirlooms.
- Check the stems. A flower stem that stays green and swells at the base is working. One that turns yellow and shrivels is not.
- Support the plant. Cut back on nitrogen once flowers show, use a fertilizer higher in phosphorus, and trim extra suckers with clean pruners. The guide on pruning tomato plants covers how.
- Wait. You’ll know within about a week if it worked, and the fruit needs several more weeks to ripen on the vine.
Every Pollination Method Explained One by One
Pollinating tomato plants comes down to vibration or light contact that knocks pollen onto the stigma. Pick whichever method fits your setup.
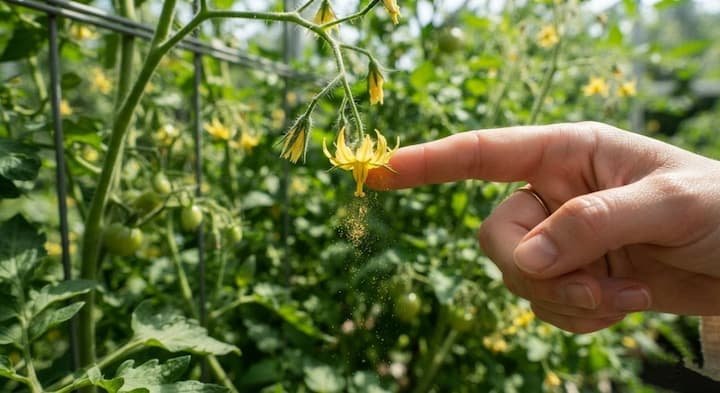
Method 1: Finger Tapping
Tap the base of the flower, right where it meets the little stem behind it. Two or three quick, light flicks are enough. Tomato flowers hang facing the ground, so a tap from behind lets pollen drop straight onto the stigma.
It costs nothing, and it works well when you only have a few plants on a balcony or in a small backyard bed. For tight clusters where your fingers can’t fit, use a thin pencil and tap with the eraser end.
For better contact, gently brush a little pollen onto the stigma with a clean fingertip. Skip hand lotion and sunscreen first, since they can gum up the pollen. Finger taps give the weakest vibration of all the methods, so repeat them every 2 to 3 days.
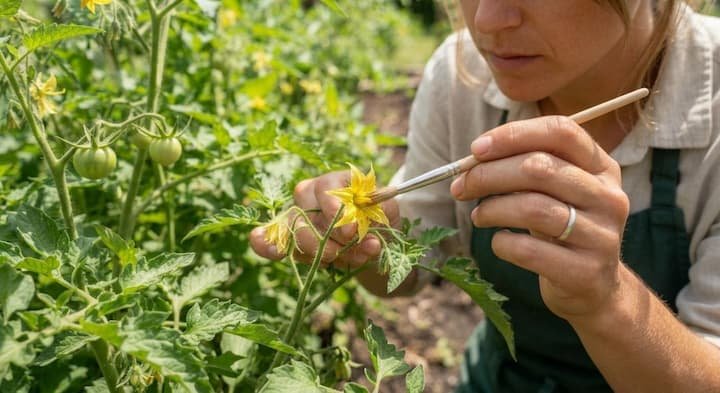
Method 2: Paintbrush
Pick a soft, small brush with a tip about a quarter inch wide. Slide it into an open flower and swirl it in tiny circles for a second or two, touching the yellow cone and the stigma in the middle. Natural bristles hold pollen better than stiff synthetic ones.
You can also hold the base of the bloom and give it a light shake, and some gardeners blow gently into the blossom as they go. Don’t push the brush deep or drag it hard, because petals tear easily.
Wipe the bristles with isopropyl alcohol if the brush touched other plants. That keeps different varieties from mixing, which matters if you save seed, and it stops plant diseases from hitching a ride.
Method 3: Q-Tip
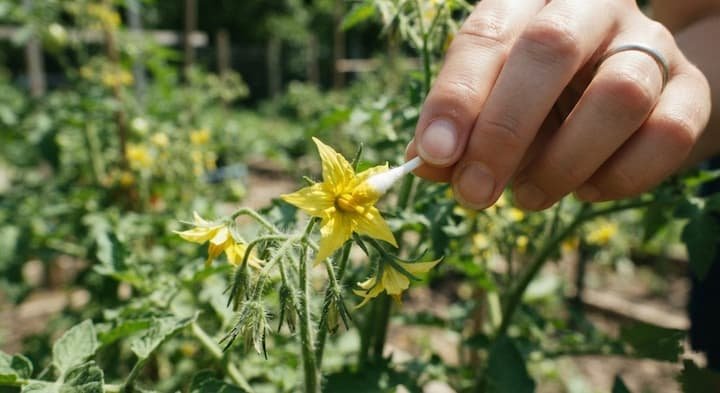
This one moves pollen on purpose. Hold a bowl, a small jar lid, or a plastic bag under a cluster of open flowers and shake the plant until yellow dust falls out. Dab a Q-tip in that pollen, then roll it around the cone and stigma of each flower.
Cotton is fuzzy, so it holds more pollen than a brush does. A stigma needs several pollen grains to set fruit, and this method delivers a bigger dose. Press lightly, since pushing hard can tear the flower.
Use a fresh Q-tip for each plant if you’re growing more than one variety. It also helps when a flower is slow to shed pollen on its own.
Method 4: Electric Toothbrush
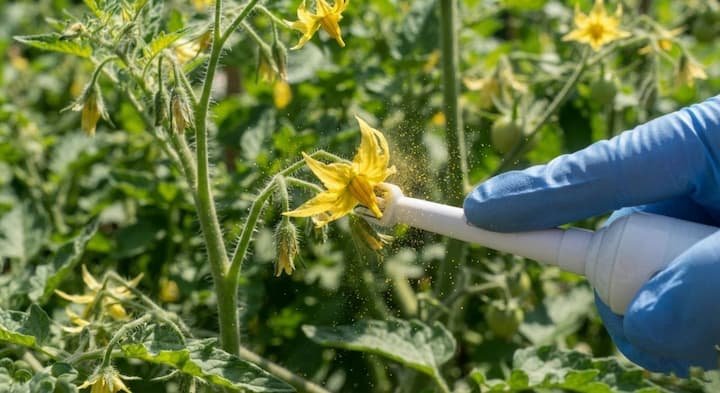
Turn the brush on and press the back of it against the back of the flower for about one second. Skip the bristles, because they aren’t needed and they can damage the bloom.
The high-speed vibration copies a bumblebee’s buzz, which is why greenhouse vibrating wands were adapted from this very tool. I like this one on humid days because the vibration breaks up clumpy pollen.
A basic battery model costs around $5 at a garden center or drugstore. Keep it as a garden-only tool and wipe it clean after use, never back in your mouth. Work down the cluster flower by flower, and check that each bloom is open and dry first. Late morning to early afternoon works best.
Method 5: Shaking the Plant
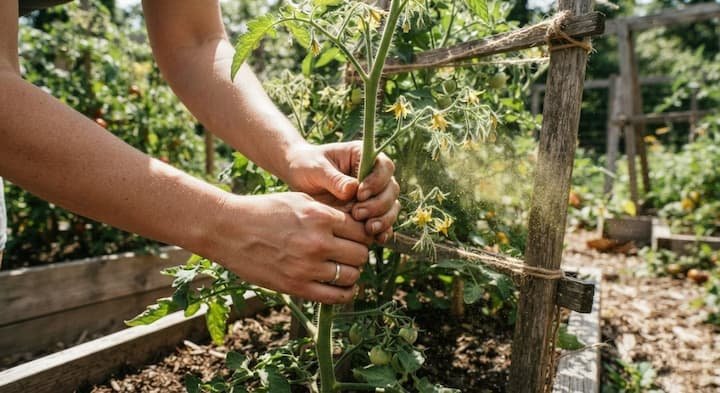
Grab the top of the plant, or the cage or stake it’s tied to, and give it a firm shake for two or three seconds. Do it around midday, when flowers are open and dry.
This is the easiest option if you’re nervous about touching flowers, and it covers a whole plant in a few seconds. Rattling a sturdy tomato trellis works just as well on tall plants. Commercial growers use vibrating tools for the same job at a bigger scale.
Skip shaking when leaves are wet, since moving soggy plants can spread disease. It can also flush out pests, and the bonus section near the end covers one of the worst.
Method 6: Fan
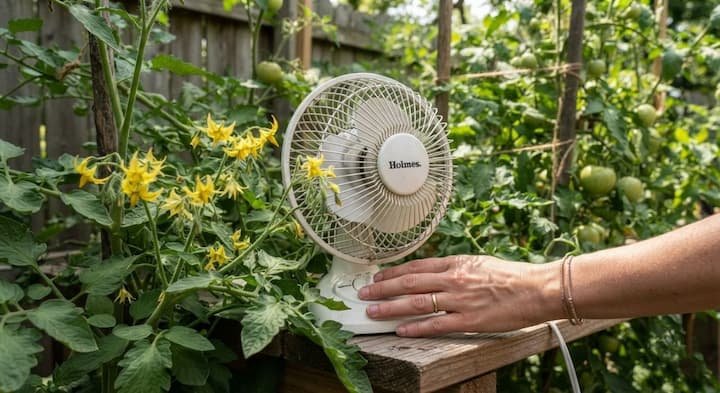
Set a small oscillating fan about 3 feet from your plants and run it on low. Aim for a gentle breeze where the leaves flutter, not a gust. A few hours a day around midday is plenty for indoor plants.
The moving air shakes pollen loose the way a breeze would outdoors, and it also dries damp leaves, which helps against mold and fungus. Too much wind dries out flowers and soil and can knock blooms off, so back the fan away if you see wilting.
A fan works best in a greenhouse, tunnel, or grow tent, paired with a second method like the toothbrush. On its own, it’s the weakest of the group.
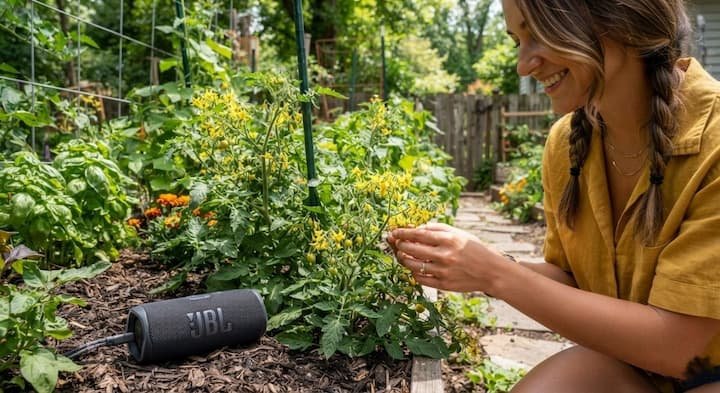
Method 7: Music or a Radio
Some growers say loud music shakes pollen loose, on the idea that sound waves create tiny vibrations. Research on sound and plants is mixed, and there’s no solid proof that it improves tomato fruit set. So treat it as a fun extra, not a plan.
If you’re already out in the yard, a speaker nearby at normal volume won’t hurt anything. Just don’t skip a real method and expect the playlist to do the work. You’ll get far better results putting those same minutes into a fan, a toothbrush, or a few taps.
Pollination in Different Growing Spaces
Hand pollinating tomatoes matters most where air and insects can’t reach. In my experience, indoor plants need help every single time.
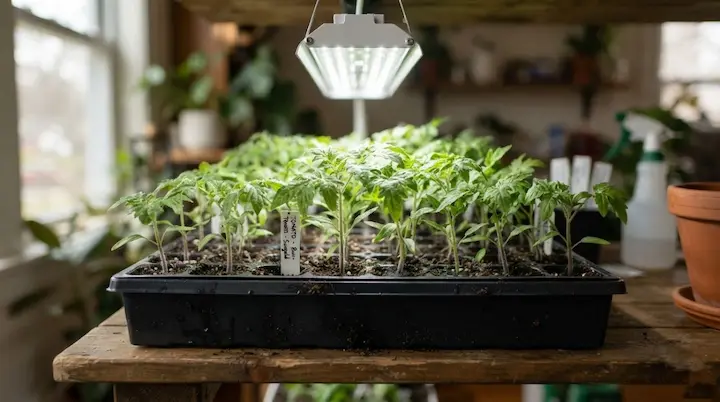
- Indoors or windowsill: add a small fan and a grow light, then tap flowers every 2 to 3 days. Without bees, indoor plants can still fruit, but only if you supply the movement.
- Balcony or patio: walls block wind, so you may need to pollinate tomatoes by hand, especially for tomatoes in pots like a 5-gallon container.
- Greenhouse or tunnel: use a vibrating wand or electric toothbrush, and open the vents on hot days.
- Open backyard: you usually only need to step in during humid spells, cold snaps, or years with few bees.
Does Tomato Variety Matter?
Yes, a little. Determinate vs indeterminate plants flower on different schedules. Determinate types flower in a window of roughly two weeks, so your timing counts. Indeterminate types keep flowering all season, so you’ll repeat the job often. If you grow the second kind, read up on growing indeterminate tomatoes.
Cherry tomatoes set fruit across a wider temperature range than large slicers, so they forgive more. Big heirloom beefsteaks usually need more attention.
Some varieties are parthenocarpic, meaning they can set fruit without pollination, often seedless, which helps in cool weather. Check the seed packet, and browse the best tasting varieties if you’re picking new ones.
How to Tell If It Worked
Check tomato flower pollination three to seven days later. Every flower sits on its own small stem, and that stem tells the story.
- Worked: the stem stays green and a small green bulb forms at the base, which is the future fruit.
- Failed: the stem turns yellow, shrivels, and no bulb forms.
A pollinated flower wilts within 24 hours and drops off in a couple of days, so don’t panic when you see petals on the soil. Poor pollination can also show up later as small, misshapen fruit or catfacing, those puckered, scarred tomatoes. You can’t really over-pollinate, but rough handling does damage.
Why Tomato Flowers Drop Without Setting Fruit
If you keep finding flowers on the ground and no bulbs forming, pollination might not be the problem. In USDA Zones 4, 5, 6, 7 and 8, cold spring and fall nights are a common cause, while summer heat is the usual one further south.
Here are the main culprits:
| Cause | What you see | Fix |
|---|---|---|
| Heat above 90°F | Flowers open, then fall | Afternoon shade, water at the base, wait for cooler nights |
| Cold nights under 55°F | Flowers open, no fruit | Cover plants at night, check when to plant |
| Too much nitrogen | Huge leaves, few flowers | Switch to the best fertilizer for tomatoes |
| Uneven watering | Drops after dry spells | Steady 1 to 2 inches a week, see the watering schedule and best mulch |
| Low light | Tall, leggy, few flowers | At least 8 hours of sun |
| Humidity extremes | Pollen clumped or dusty | Fan or electric toothbrush |
| Strong wind or heavy fruit load | Blooms knocked off, fewer new flowers | Add a windbreak, thin extra fruit |
| Pests or disease | Chewed or spotted leaves | Treat the plant first |
Epsom salt won’t fix any of these, so skip that shortcut.
Common Mistakes to Avoid
I think rough handling is the biggest mistake, since torn flowers can’t make fruit. These are the others I see most:
- Working at the wrong time of day, like early morning or late evening when blooms are damp.
- Working on flowers that are wet from dew or rain.
- Squeezing, pulling, or poking the flowers.
- Wearing gloves that make your touch clumsy.
- Hand pollinating tomatoes during a heat wave above 90°F, when the pollen is already weak.
- Pollinating tomato plants once, then giving up instead of repeating every 2 to 3 days.
- Feeding extra nitrogen once the plant is flowering.
- Reusing a dirty brush between different plants.
Cross-Pollination on Purpose and Seed Saving
Accidental crossing is rare, since each flower has everything it needs. Pollen from a different variety won’t change this year’s fruit. It only changes the seeds inside, so seed savers can end up with odd plants next year.
To keep your heirloom seed true, grow different varieties at least 10 feet apart or cover the blossoms with a small mesh bag. If you want to cross two varieties on purpose, use emasculation.
Pick a bud that is about a day from opening, gently pull off the yellow cone with clean tweezers, then dab pollen from the other variety onto the stigma and tie on a tag so you remember the cross. The guide on growing heirloom tomatoes goes deeper on seed starting.
Bring in Natural Pollinators for the Long Run
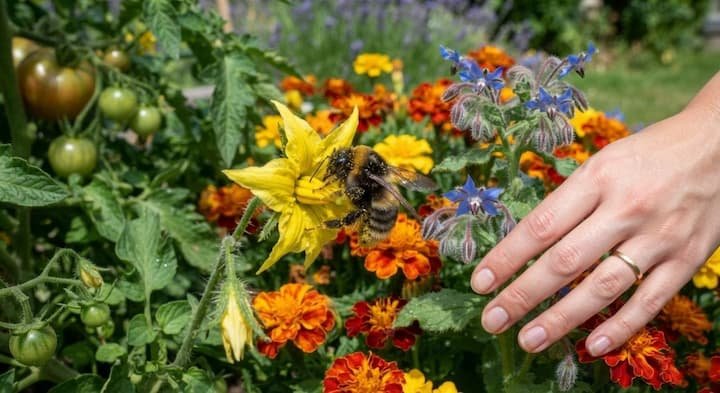
You won’t want to do this by hand forever. I tuck a few marigolds and borage near my beds every year, and the bumblebees show up on their own.
- Plant native flowers close to your tomatoes.
- Skip sprays while blooms are open.
- Leave a small patch of bare soil or brush for bumblebee nests.
If you’re a community gardener, talk with your neighbors about the same steps, because bees travel between plots.
Bonus: Shaking Can Expose Hornworms
When you shake the plant or rattle the trellis, hornworms often wiggle or hiss and give away their spot. Pick them off, drop them in soapy water, then toss them in the garbage. The page on tomato hornworms shows how to spot the rest.
Final Thoughts:
Now you know how to hand pollinate tomatoes, when to do it, and when to leave it alone. Pick your tool, work around midday, and check those stems in a week. If flowers still drop, look at heat, cold nights, water, and feeding before blaming pollination. A little patience and a gentle touch will fill your backyard beds well before the first fall frost at 32°F.

Pingback: How to Ripen Green Tomatoes: Easy Proven Ways That Work