
Why do some gardeners end up with thick, sturdy plants loaded with striped, purple, and pink fruit, while others get a tray of weak, stringy sprouts?
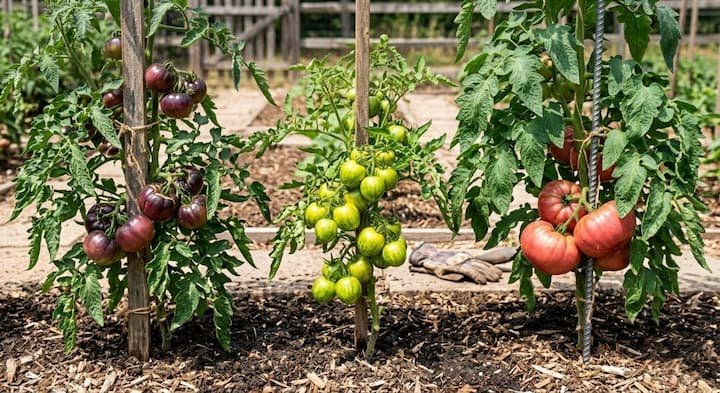
It mostly comes down to a few habits that never make it onto the seed packet. Here is how growing heirloom tomatoes from seed really works, from timing and light to seed saving, so your backyard harvest actually tastes like something worth the wait.
What Are Heirloom Tomatoes and How They Differ From Hybrids
An heirloom is an open-pollinated variety that gardeners have grown and saved for 50 years or more, often passed down through a family. Because the plants pollinate naturally, the seeds grow true to the parent plant.
Not every open-pollinated tomato counts as an heirloom, though. Newer stable varieties are open-pollinated too, they just haven’t been around for 50 years. Hybrids come from crossing two different parent lines, usually for even ripening, shipping toughness, or built-in disease resistance, so their seeds won’t repeat the same fruit next year.
One more mix-up: heirloom doesn’t mean organic. You can grow an heirloom with synthetic fertilizer, and an organic tomato can be a hybrid.
The trade-offs are real: thin skins, poor shipping, lower yields, and less built-in disease resistance. That’s why grocery stores rarely carry them. The flavor and color make up for it.
Why Start Heirlooms From Seed
- Flavor: these varieties were picked over generations for taste, not shelf life, and the difference shows the first time you slice one.
- Variety: heirloom tomato seeds give you access to thousands of types that no garden center stocks.
- Cost: one packet usually costs about the same as a single nursery plant, and you get a whole tray of seedlings. It also explains the high price at farmers markets: heirlooms bruise easily, yield less per plant, and don’t travel well.
- Seed saving and preservation: saving seeds from heirloom tomatoes keeps a favorite variety going for free, and it helps keep rare old lines from disappearing.
Best Heirloom Varieties to Try
Pick for your climate first and your taste second. I think Cherokee Purple is the best starting point for most backyards because it’s forgiving and tastes rich and smoky. For flavor picks, see our best tasting varieties.
| Variety | Habit | Days to harvest (approx.) | Best for |
|---|---|---|---|
| Brandywine | Indeterminate | 90-100 | Big pink slicers, long seasons |
| Cherokee Purple | Indeterminate | 80-90 | Rich flavor, warm summers |
| Green Zebra | Indeterminate | 75-80 | Tangy striped fruit |
| Paul Robeson | Indeterminate | 80 | Dark, smoky slicers |
| Japanese Black Trifele | Indeterminate | 75-80 | Pear shapes, deep flavor |
| Kellogg’s Breakfast | Indeterminate | 80-90 | Mild, sweet orange beefsteaks |
| Yellow Pear | Indeterminate | 70-80 | Snacking, salads, color |
| Stupice | Indeterminate (compact) | 55-65 | Cool, short seasons |
| Manitoba | Determinate | 63 | Short seasons, slicing |
| Silvery Fir Tree | Determinate | 60-70 | Pots, ornamental leaves |
Region-based picks:
- Short seasons (USDA Zones 3, 4 and 5): Stupice and Manitoba ripen early.
- Hot, humid summers (USDA Zones 8, 9 and 10): expect more disease pressure and watch for cracking.
- Small spaces: Silvery Fir Tree and Stupice stay compact in containers.
Determinate vs Indeterminate: Why It Matters
Determinate plants stop at a set height, set most fruit in a few weeks, and need little pruning. Indeterminate plants keep growing until frost, so they need tall support and regular suckering. Most heirlooms are indeterminate.
New to this? Read determinate vs indeterminate and growing indeterminate tomatoes before you pick seeds.
When to Start Growing Heirloom Tomatoes From Seed: Zone Timeline
Start seeds indoors 6 to 8 weeks before your average last frost date. Look yours up with the Old Farmer’s Almanac planting calendar, then count backward.
In my experience, starting two weeks too early gives tall, tangled plants that sulk after transplanting. For outdoor timing, check when to plant tomatoes in your area.
| USDA Zone | Typical last frost | Start seeds indoors |
|---|---|---|
| Zone 4 | Late May | Early to mid April |
| Zone 5 | Mid May | Late March |
| Zone 6 | Early May | Mid March |
| Zone 7 | Mid April | Late February to early March |
| Zone 8 | Late March | Early to mid February |
Dates shift a week or two with your microclimate.
A rough week-by-week timeline:
- Week 0: sow seeds.
- Weeks 1-2: sprouts appear, lights go on.
- Weeks 3-4: first true leaves show up, time to pot up.
- Weeks 5-8: harden off, then transplant after frost.
In USDA Zones 9, 10 and 11, you can also sow in late summer for a fall crop. Direct sowing outside works once the soil hits 60°F, but yields are smaller and the season is shorter than with indoor starts.
If your summers are short, a greenhouse or hoop house stretches the season and makes pests easier to manage, though it isn’t required.
Supplies You Need
- Seed starting mix: sterile and fine-textured. Garden soil and regular potting mix are too heavy and can carry disease. A DIY blend is roughly equal parts peat or coir, perlite, and vermiculite.
- Trays or cups: 2 to 4 inch containers with drainage holes. Yogurt cups work.
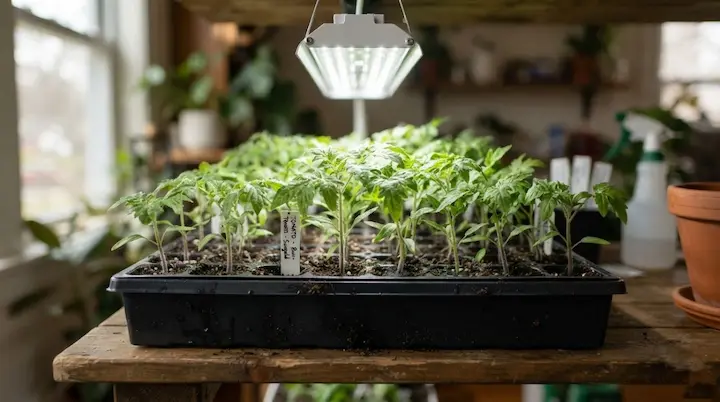
- Grow light: I like a basic LED shop light because it’s cheap and runs cool. A sunny window rarely gives enough light.
- Heat mat, humidity dome, labels, spray bottle, and a small fan.
Ballpark costs: a seed packet runs a few dollars, a bag of mix around $10, a basic LED light $25 to $40, and a heat mat about $20 to $25. Budget $50 to $100 for a first-year setup, depending mostly on the light. Buy heirloom tomato seeds from a company you trust and check the packed-for date.
How to Grow Heirloom Tomatoes From Seed: Sowing Step by Step
- Test old seed first: Put 10 seeds on a damp paper towel, slide it into a plastic bag, and keep it warm. If 7 sprout in 7 to 10 days, you have about 70% germination, which is fine.
- Soak (optional): 6 to 12 hours in room-temperature water can speed things up.
- Pre-moisten the mix: Mix in water an hour before sowing until it feels like a wrung-out sponge.
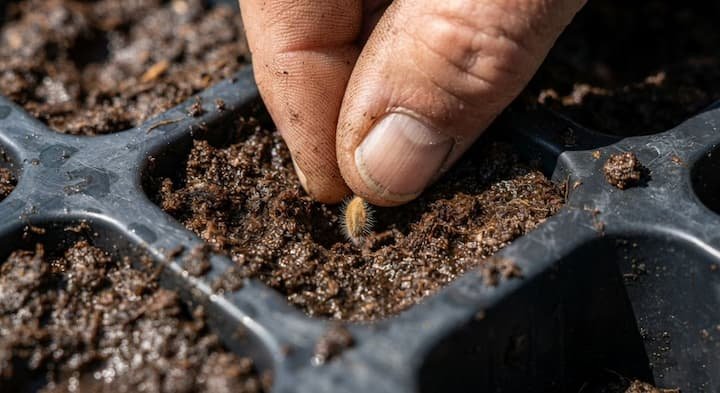
- Fill and sow: Fill cells, leave a little room at the top, and sow 1 to 2 seeds per cell at ¼ inch deep. Thin to the strongest seedling later.
- Label right away: with variety and date.
- Warm and cover: Set trays on a heat mat at 75°F to 85°F with a dome on top.
Expect sprouts in 5 to 14 days. Temperature explains the range. According to University of California Master Gardener materials, tomato seeds can still sprout at 50°F, but it takes over 40 days, and there’s little to no germination at 104°F. Pull the dome the day you see green.
Caring for Heirloom Tomato Seedlings
Light matters most. Keep the grow light 2 to 4 inches above the seedling tops and run it 14 to 16 hours a day on a timer. Raise the light as they grow, since weak light is the top cause of leggy stems.
- Temperature: after sprouting, a cooler room around 60°F to 70°F builds stockier plants.
- Airflow: a small fan on low for a few hours a day strengthens stems.
- Watering: set trays in a shallow pan of water for 15 to 20 minutes, then drain. Bottom watering helps prevent damping-off.
- Feeding: once the first true leaves open, give half-strength liquid organic fertilizer once a week.
For more on the basics, see our guide to starting seeds indoors.
Potting Up Your Seedlings
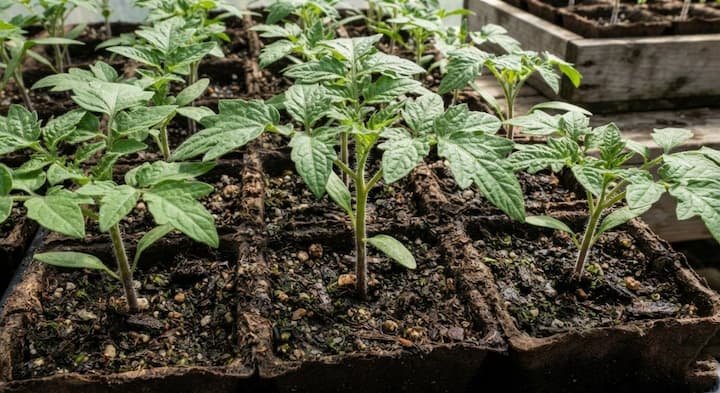
When seedlings have two sets of true leaves, or stand around 3 to 4 inches tall, move each one into its own 3 to 4 inch pot. I always hold the seedling by a leaf, never the stem, since the stem crushes easily.
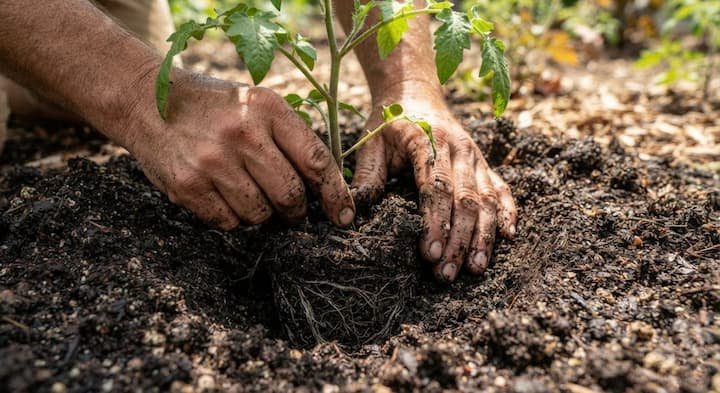
Bury the stem deeper than it was before. Tomatoes grow new roots along buried stem, which gives you a sturdier plant.
If you started early or spring is running late, pot up again into a quart or 1-gallon container. And if a seedling is taller than 6 inches at final planting, pinch off the lower leaves before burying it.
Hardening Off Day by Day
Start 7 to 10 days before transplanting. Never skip it, because indoor plants burn and stall in real sun and wind.
- Days 1-2: shady, sheltered spot for 1 to 2 hours.
- Days 3-4: morning sun and 3 to 4 hours outside.
- Days 5-6: half the day outside with more direct sun and wind.
- Days 7-10: full days outside, with full sun by the end.
- Cold nights: bring seedlings inside if it drops below 50°F.
I use a plastic storage tote with a lid as a makeshift cold frame, which makes carrying heirloom tomato seedlings in and out much easier.
Transplanting Into the Garden
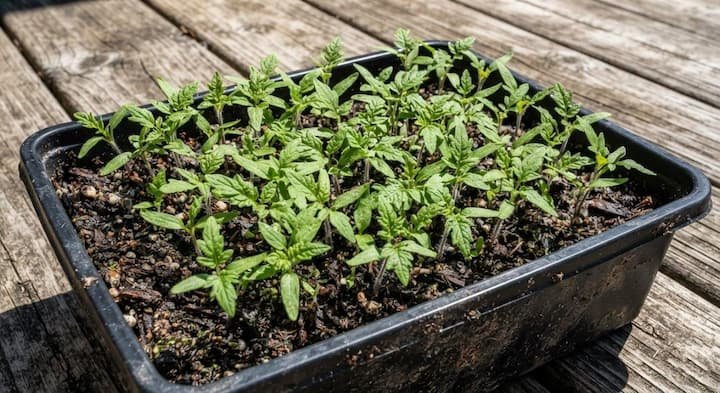
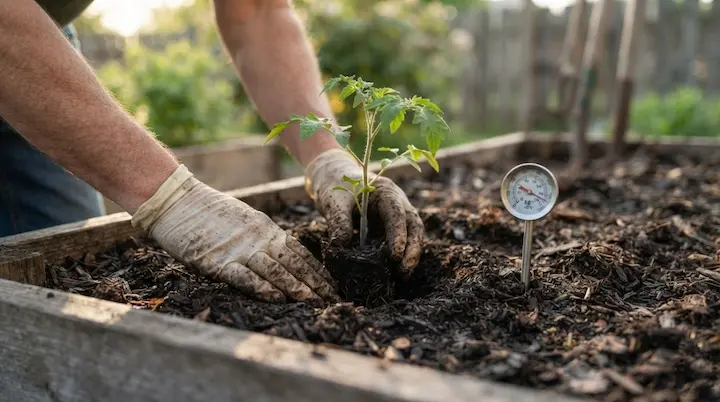
Wait until frost is gone, soil sits near 60°F, and nights stay above 50°F. Pick a spot with 6 to 8 hours of direct sun, good drainage, and decent airflow.
Those hours don’t have to be in one stretch, so morning plus afternoon sun counts. Running rows north to south gives plants the most light. Skip low frost pockets and spots near a neighbor’s herbicide spraying.
Aim for soil pH between 6.0 and 6.8. Work 3 to 4 inches of compost into the top 10 to 12 inches of soil. If you’re making your own, check the green to brown compost ratio, and learn whether citrus peels in vermicompost are okay.
Planting steps:
- Dig a hole wider than the root ball and deep enough to bury the stem up to the first leaves. For a tall, leggy seedling, dig a shallow trench and lay the stem sideways so more of it roots.
- Add a handful of bone meal plus crushed eggshell or 1 tablespoon of lime for calcium. Some gardeners also add a pinch of Epsom salt, and our Epsom salt tips explain when it helps.
- Optional extras: worm castings, 1 teaspoon of mycorrhizal fungi, or a little gypsum in the hole for extra calcium.
- Space plants 18 to 30 inches apart in rows 3 to 4 feet apart.
- Water deeply right away.
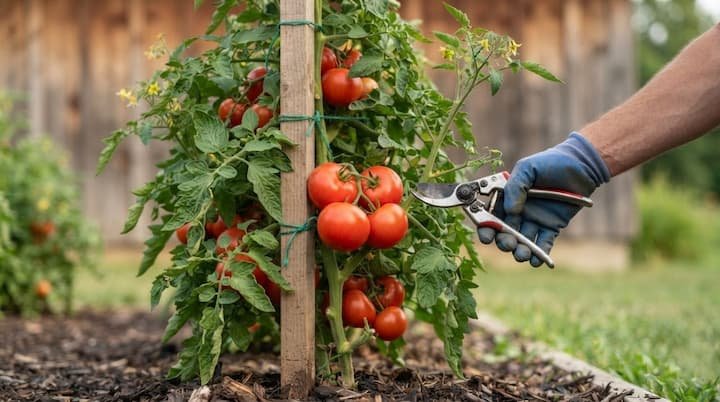
Install support at planting time so you don’t damage roots later. Heavy heirloom fruit snaps weak cages, so see how to build a tomato trellis that holds up all season.
Growing Heirlooms in Containers
Use a pot at least 12 to 18 inches deep, about 5 gallons or more, with drainage holes, and plant one tomato per pot. Compact or determinate varieties do best. Put stakes in at planting.
Pots dry out fast, so check daily and expect to water every day in a heat wave. At season’s end, toss the old mix in the trash to avoid carrying disease over. More setup ideas are in our guide to tomatoes in pots.
Ongoing Care for Heavy Harvests
Water deeply at the base, aiming for 1 to 2 inches per week. Avoid overhead sprinklers because wet leaves spread disease. Our guide on how often to water covers pots versus beds. Add 1 inch of straw or wood chip mulch to hold moisture and stop soil splash.
Go easy on nitrogen, since too much gives leaves instead of fruit. A balanced organic fertilizer or compost tea every 2 to 3 weeks works well once flowers appear, and once fruit sets, a mix a little higher in phosphorus and potassium helps it fill out. Heirlooms aren’t harder than hybrids, just less forgiving of uneven watering and weak support.
Pinch suckers while small with clean pruners, but don’t strip too many leaves. Pick off hornworms and aphids by hand, and use insecticidal soap or neem if needed.
Troubleshooting Seedling and Plant Problems
- Leggy seedlings: not enough light. Lower the lights and bury the stem deeper at potting up.
- Damping-off: seedlings collapse at the soil line. Use sterile mix, water from below, and add airflow.
- Purple leaves: usually cold roots. Warm the room a bit and the color fades.
- Yellow seed leaves: normal as they age. If true leaves yellow too, cut back watering.
- Mold on soil or fungus gnats: soil is too wet. Let the top dry out and add a fan.
- No sprouting: old seed or cold soil. Run a paper towel test.
- Slow, stunted growth: usually cold soil, a root-bound pot, or too little light. Warm the room, pot up, and lower the light.
- Blossom end rot: a calcium uptake problem from uneven watering. See blossom end rot fixes.
- Cracking and catfacing: from swings in water or cool nights at bloom. Mulch and keep watering steady.
- Thin skin and green shoulders: common in heirlooms. Pick on time and give fruit some leaf cover in hot sun.
- Early blight, late blight, and septoria: heirlooms have little resistance, so remove lower leaves, mulch, and rotate beds every 3 years.
- Wilts (fusarium, verticillium): soil-borne, so rotation matters more than any spray.
When and How to Harvest
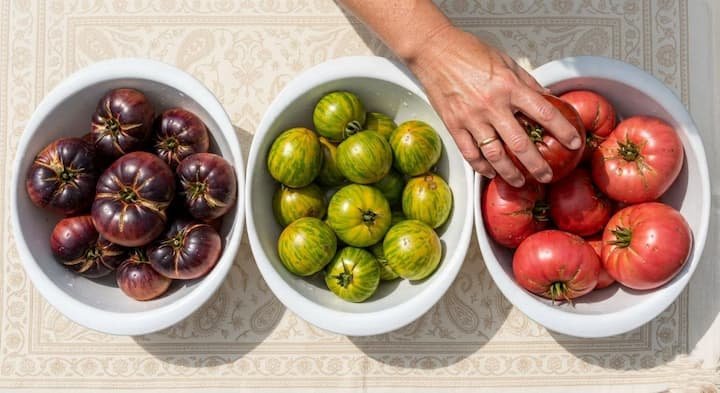
Most heirlooms need 70 to 100 days after transplanting, and some beefsteaks take longer. Green Zebra gets a yellow glow, Cherokee Green stays green inside but turns yellow outside, and dark types ripen to a deep shade. Gently press the fruit and look for a slight give.
I pick at the first blush of color when rain is coming, then finish ripening on the counter, since split fruit is the bigger risk. Keep them stem-side down and out of the fridge, since cold dulls flavor. Plan on 8 to 10 pounds per plant, a bit under hybrids, and use them within about a week.
Saving Seeds From Heirloom Tomatoes
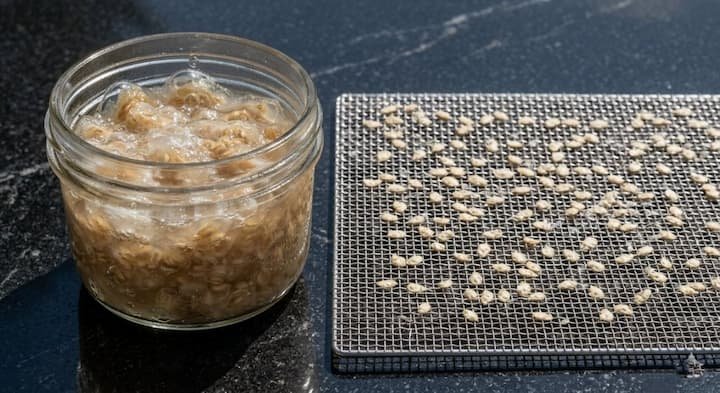
Choose ripe fruit from healthy plants. Scoop seeds and gel into a jar with a little water and ferment 3 to 4 days, stirring daily. Good seeds sink.
Rinse, pouring off pulp and floating seeds, until the water runs clear, usually 3 to 6 washes. Spread the seeds on a plate or screen with a fan blowing, and keep them out of heat above 80°F. Cure them 2 to 4 weeks, then store airtight in a cool, dark, dry place. Good seed lasts 3 to 5 years.
If you grow several varieties, keep them 20 to 25 feet apart or put a tall barrier crop between them to limit cross-pollination.
Final Thoughts:
Growing heirloom tomatoes from seed rewards a bit of planning more than any special gear. Hit your zone’s start date, give seedlings strong light, harden them off slowly, and plant them deep. Then you’ll pick odd-shaped, colorful tomatoes from your own backyard, save the best seeds, and start the whole cycle again next spring with even better results.
Pingback: Grow Tomatoes From Store Bought Tomatoes - Proven Guide